Hope Reflected

Encouragement and Hope from God's Word

stone bench Archive

Tuesday

19

September 2017

Hope’s How-To | Dry Lay Stone Border

Written by , Posted in Gardening, Hope's How-To

Several of you have asked why we haven’t shared any photos of what we’ve been working on in our garden and yard so far this year. Well, friends, it’s been a full summer! Wes and I have both commented to each other several times that we feel that we’ve hardly had any time to be at home this summer and just… be. Anyone else with us?!

How to build a stone border | See our latest garden stone border at hopereflected.com

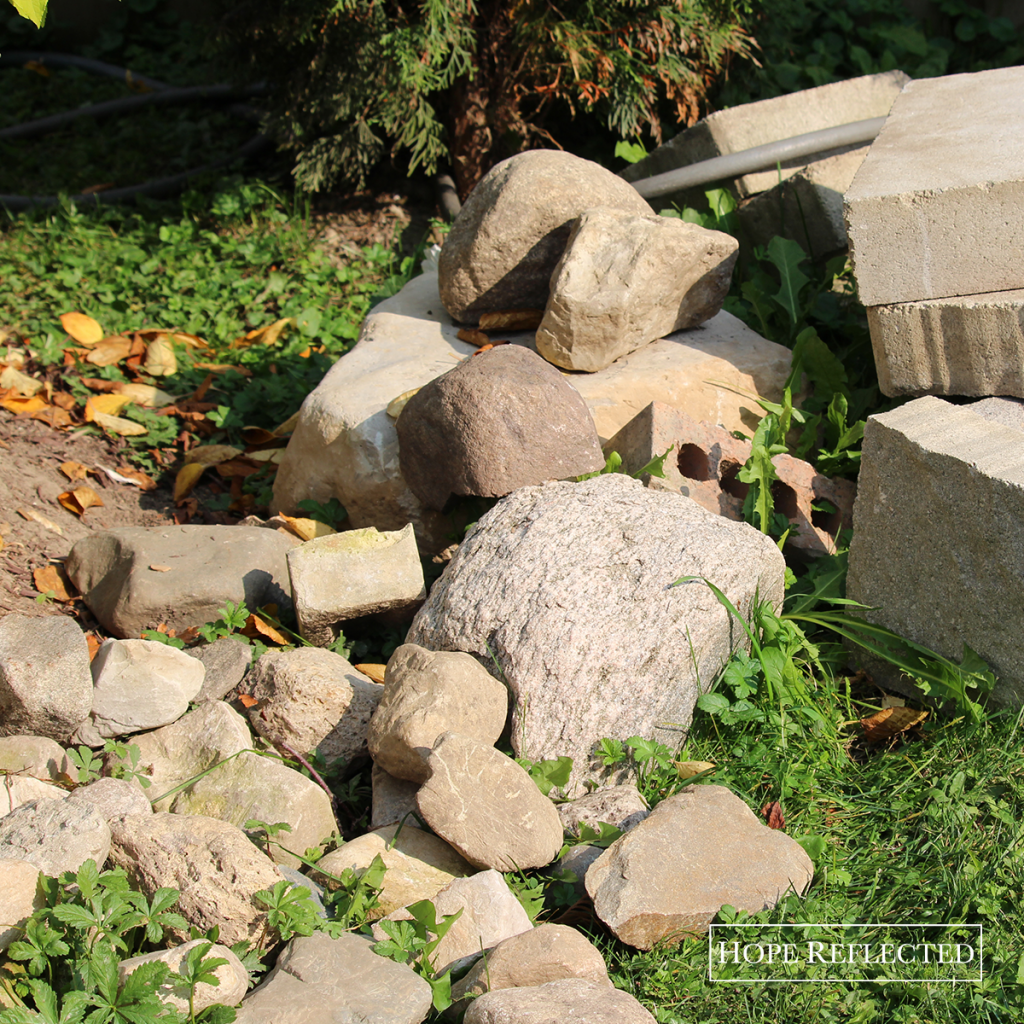
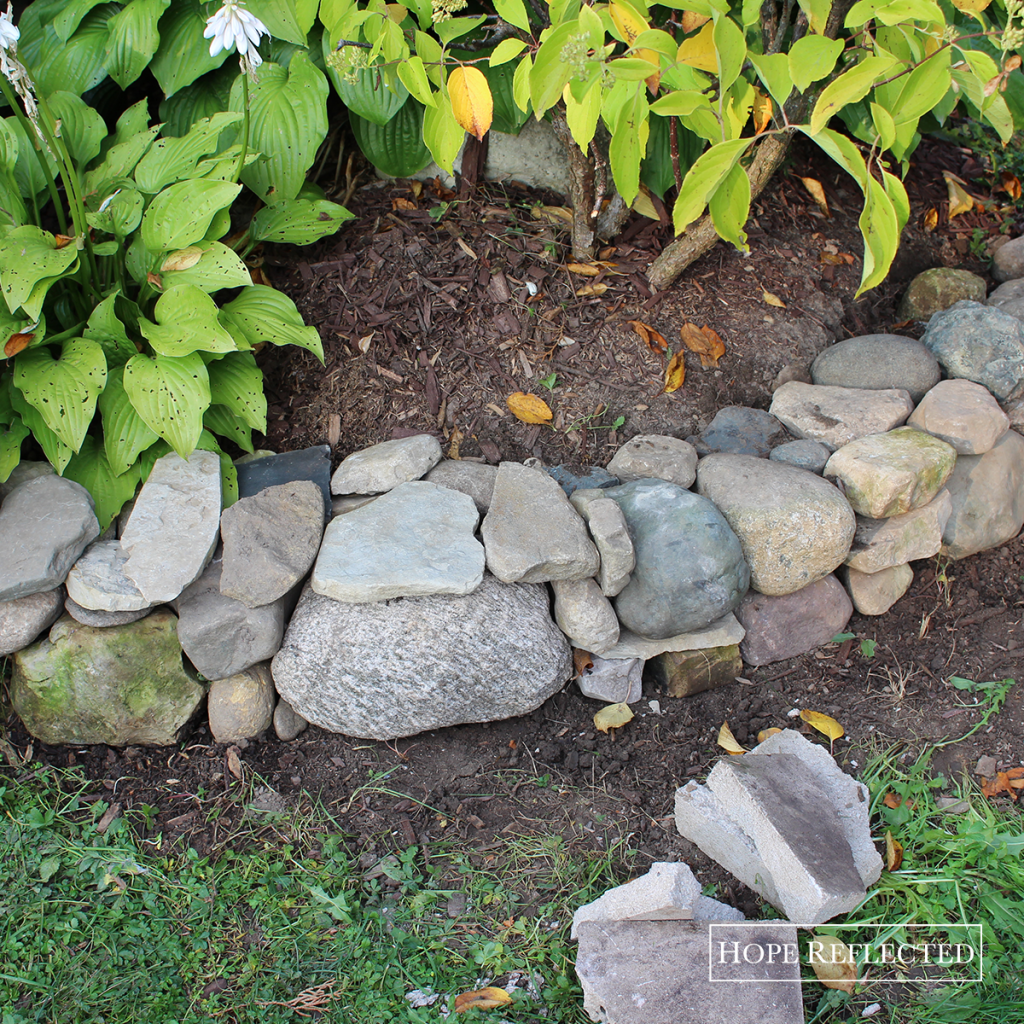
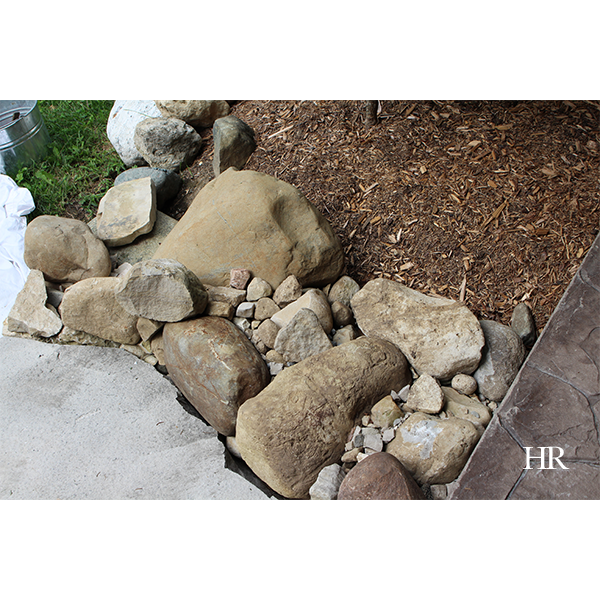
This past weekend, we were able to enjoy a brief respite from the world and spend some time outside in the garden and yard. Wes was able to get started on the next stone border in our garden, and I must say, it’s looking so beautiful I just had to share some pictures. Check out the “before” photo below.

Our latest garden stone border is on the blog! | See more at hopereflected.com

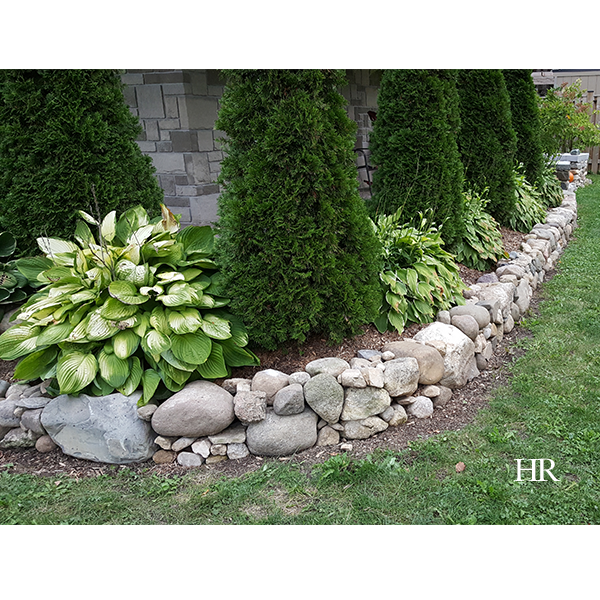
If you’ve been following along with our blog, you’ve already seen photos of the garden stone border that Wes completed last summer. Well, this summer, between concentrating on our hedge and planting more cedars, we’ve had little time to dedicate to finishing the dry lay stone border on the south side of our garden.

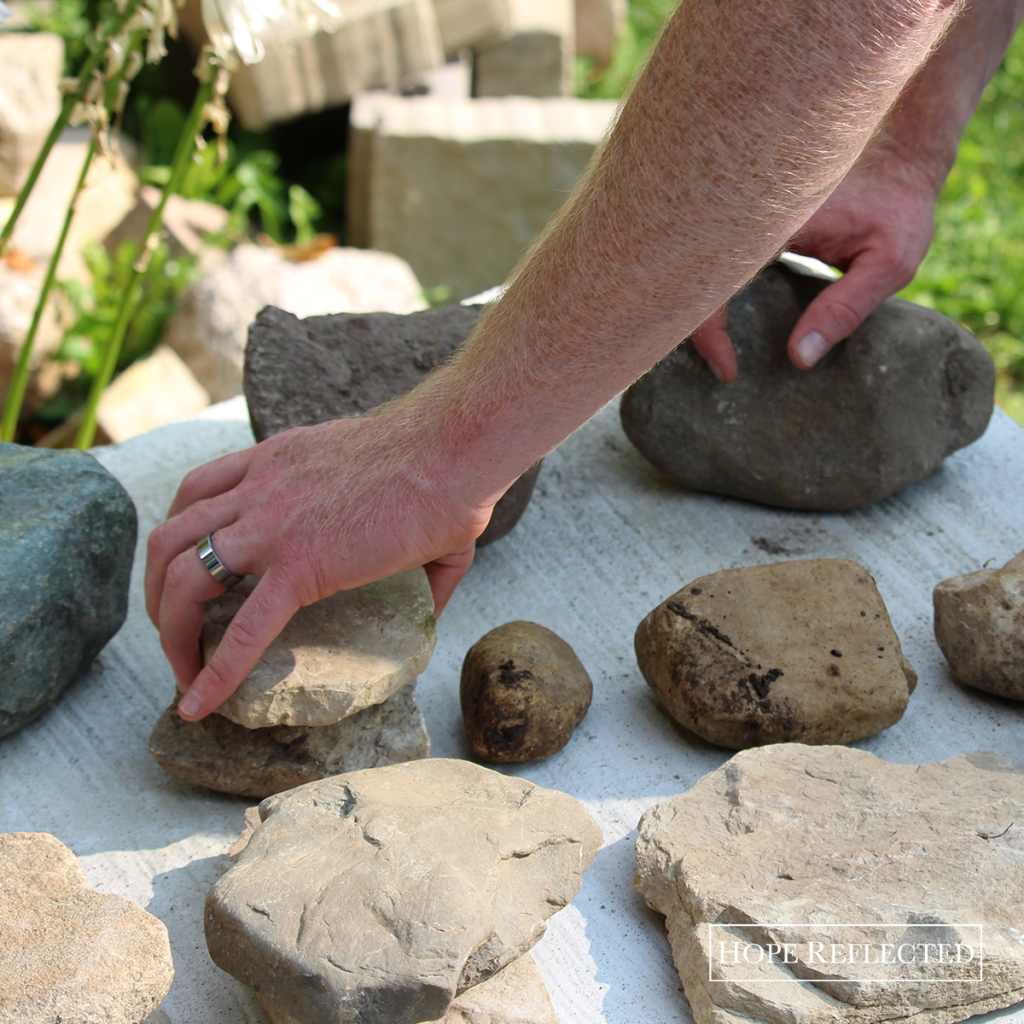
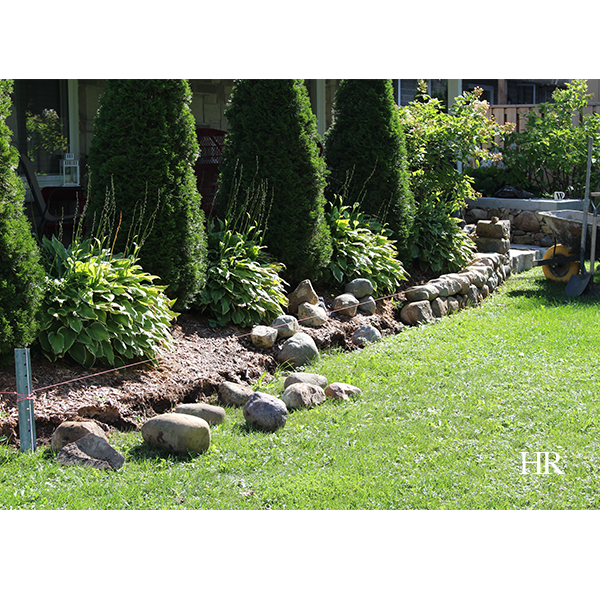
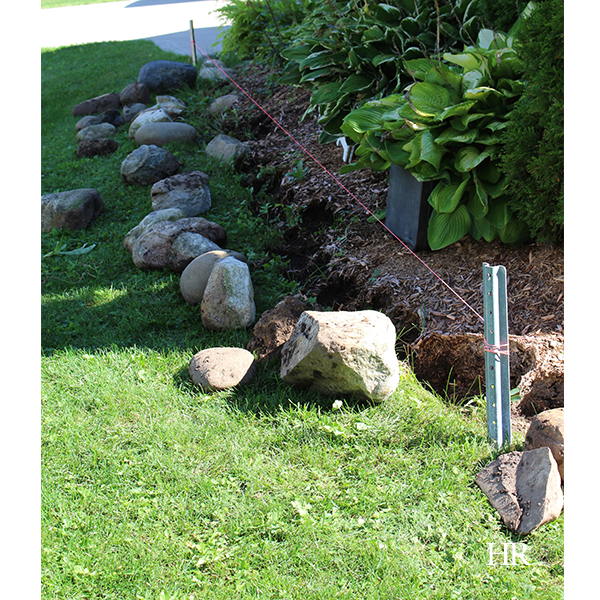
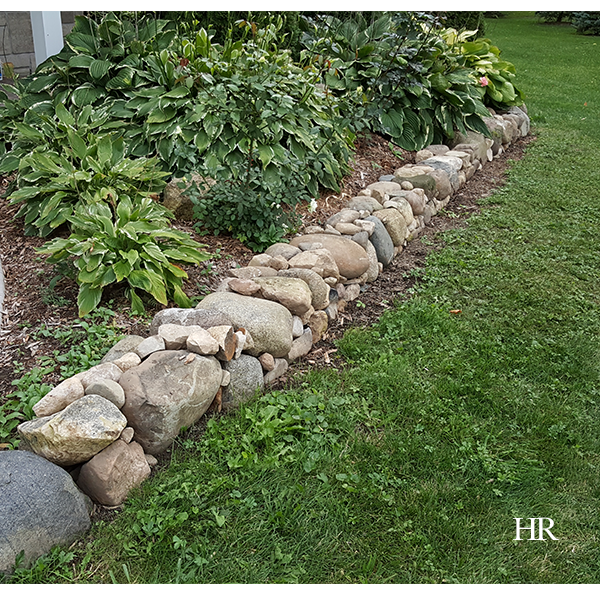
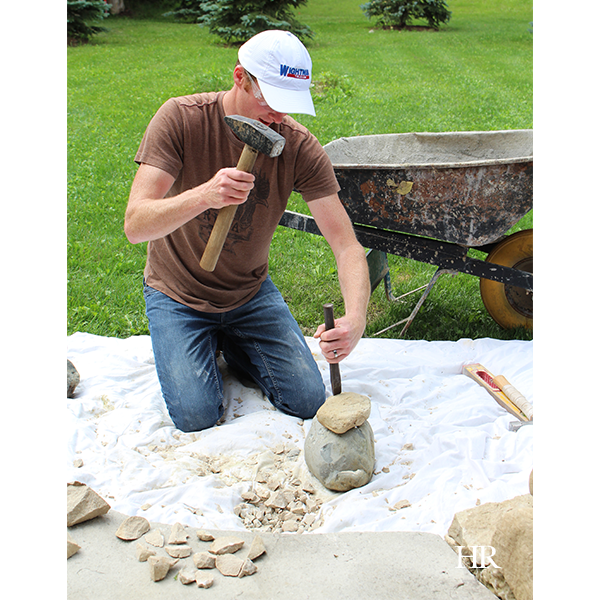
This past weekend, Wes went to work sorting stones and carving out the foundation for our latest dry lay stone border around the garden.

Our latest garden stone border is on the blog! | See more at hopereflected.com

Our latest garden stone border is on the blog! | See more at hopereflected.com

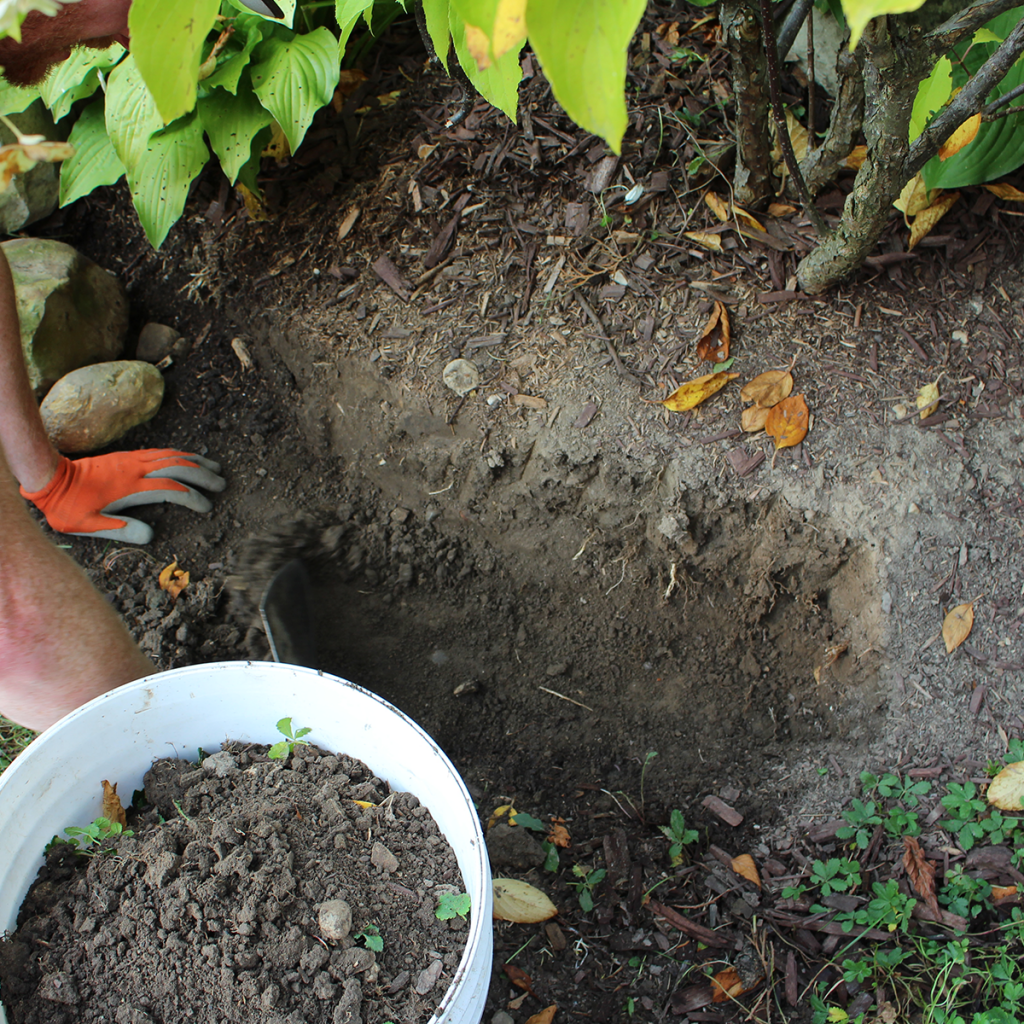
Wes started by cutting back the dirt bank about 10 inches to accommodate for the dry lay stone border. He dug out at an angle so there was positive slope towards the flower bed, which ensures that the stone actually sits into the bed rather than leaning out from the flower bed.

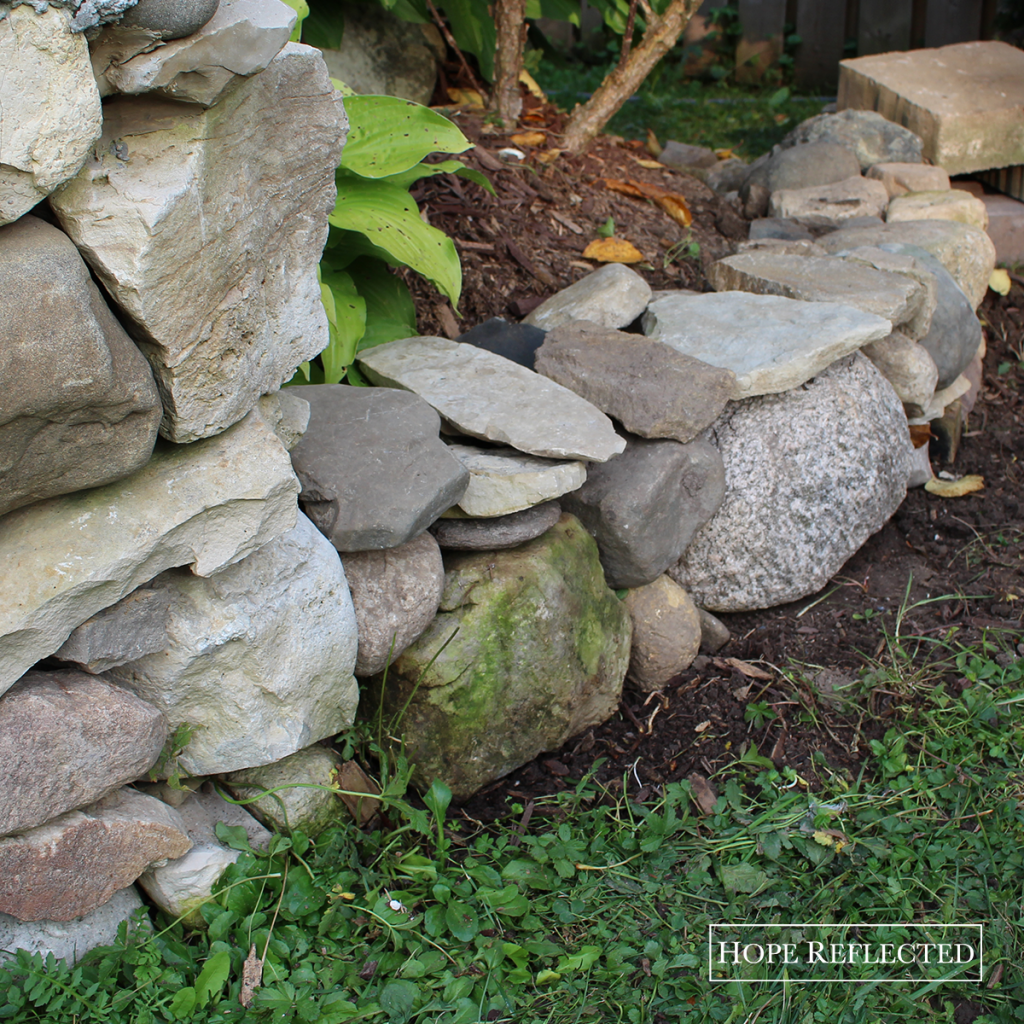
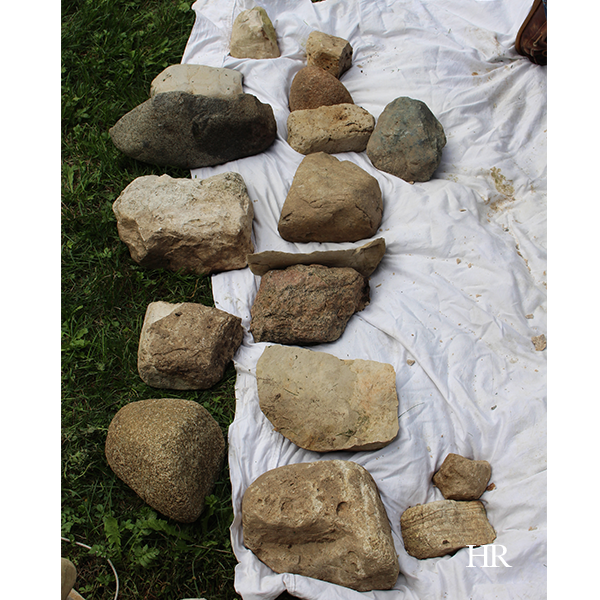
He placed the larger stones after taking a full inventory of the stones he had to work with (see photo above), and went to great lengths to place them evenly throughout the border wall. There was definitely some trial and error involved with creating the dry lay stone border. As Wes noted, the nice thing about this kind of application is that it does not have to be permanent; stones can be adjusted and moved if you get looking at them and feel you don’t that you don’t like the placement. In fact, areas can be entirely dismantled and reassembled to your liking. That’s the beauty of creating a dry lay stone bench or stone border for your garden! Wes says to think of the stones that you already have in your possession as pieces to your puzzle. There will be stones that sit better together; you just have to take the time to find them and to make the pieces work.

Our latest garden stone border. | See more at hopereflected.com

Our latest garden stone border. | See more at hopereflected.com

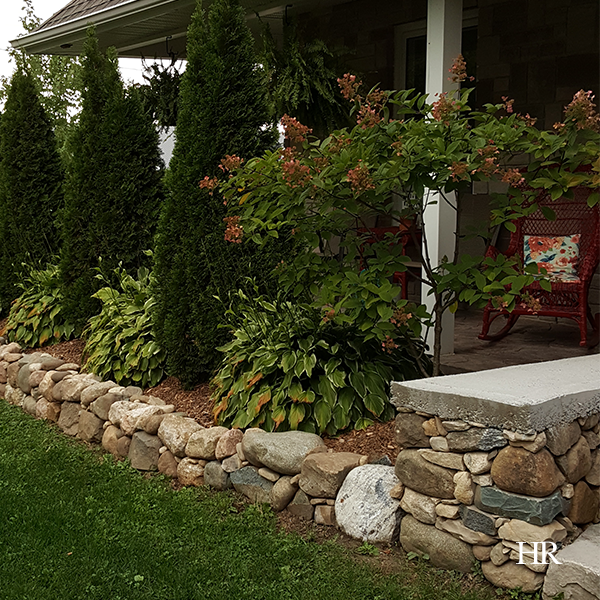
For us, this latest garden stone border project already makes a beautiful addition to our yard. Our latest border helps balance out the rest of the border around the garden. I love how Wes placed some of the larger stones evenly throughout the first level, and how he was so careful with the colour placement of the stones as well. I can’t wait to see the finished product!

Check out more photos of our DIY stone projects, stone garden benches, and stone borders and let us know what you think!

 

Tuesday

4

October 2016

Garden Stone Border

Written by , Posted in Gardening

garden stone wall

Our yard has been buzzing with activity this season; I’m thankful to be married to a man who is so gifted. Wes has spent several hours over the spring and summer season complementing our garden with three dry lay stone benches (you can see the stories here).

After the completion of our stone benches, Wes started on our garden stone border. Previously, we had a single row of large rocks edging our flower beds. We thought it would look beautiful to tie in the strength of the dry lay stone benches off the patio, and bring them all around the flower bed, creating a strong stone border to showcase our garden.

garden stone border

After pulling the stones that were originally edging the garden, Wes stationed some stakes at either end of the garden as well as the corner, and strung a line around the perimeter of the flower bed. He also levelled the line so it was even all around. This line acted as a guide as Wes built the border, to provide consistency in both height and straightness.

garden stone wall

Another important thing to keep in mind if you’re looking to create your own garden stone border, is how you disperse the large stones throughout the border. Wes was careful to keep things consistent so that all the large stones were not bunched in one area, but rather dispersed evenly throughout the garden wall. As you can see from the photo above, the start of the garden stone border blends well with the dry lay patio bench, and is about half the height of the bench.

garden stone border

It’s important to keep colour in mind if you’re building a stone garden border (or a stone wall of any kind, for that matter). Sometimes the colour of the stone is more important than the size or shape. Notice in the photos above, how Wes evenly distributed stone colours, size, and shape to achieve a uniform, attractive edge. The photos don’t really do it justice, but this wall is incredibly constructed, and has an even, flat top and straight lines.

garden stone border

Wes did quite a bit of working and re-working to consider where the stones would best fit. Not only is he extremely gifted, but patient as well! The end result is a classic, eye-catching stone garden border that really highlights our flower beds.

Tuesday

27

September 2016

Hope’s How-To: Build a Dry Lay Stone Bench, Part 2

Written by , Posted in Gardening, Hope's How-To

Hope's how-to: Build your own dry lay stone bench

As you’ve read previously, Wes has completed two dry lay stone bench projects in our yard. In August, he started working on a third, just off our patio, and we’re finally getting around to posting more photos of the whole process. The photo above shows the dry lay bench when the yard-facing end was complete. Wes notes that if you’re building your own dry lay stone bench, it’s important to consider that each layer of the bench should be completed at the same time for structural strength.

dry lay stone bench

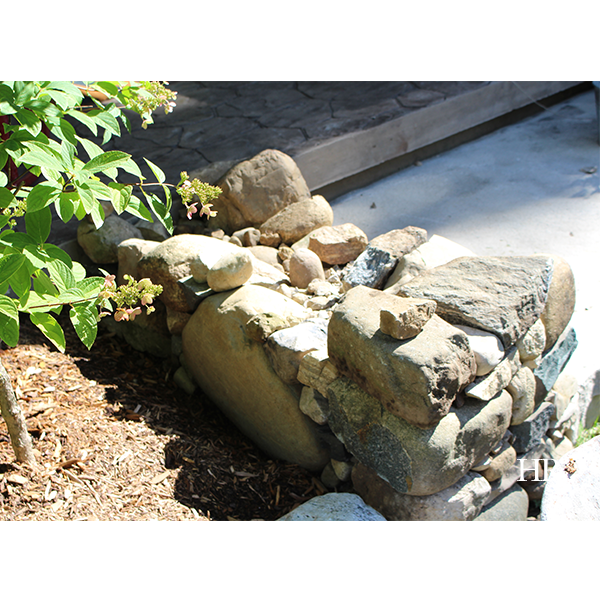
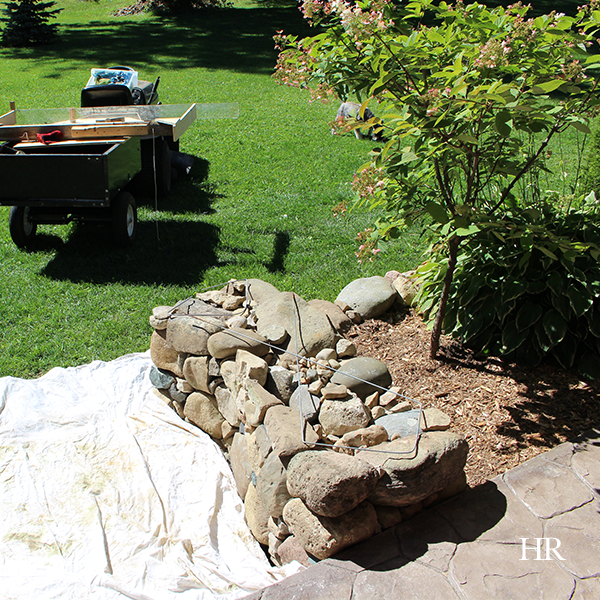
This is a photo from our patio vantage point, looking at the completed dry lay bench, just before Wes poured the concrete cap. Wes was very careful to maintain the angle of the bench, taking into consideration which way we want the water to run off the bench (away from our home and patio). During the building of the bench and pouring of the concrete cap, our patio stone was covered to prevent any staining or damage.

dry lay stone bench

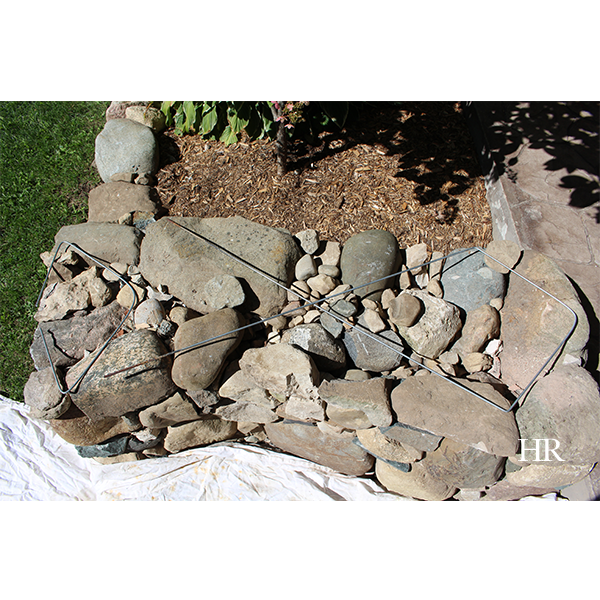
In preparation for pouring the concrete cap, Wes utilized some old wire from a sign in substitution for rebar and to reinforce the strength of the concrete cap. We debated whether we actually wanted to pour a cap on this bench, or just leave it as an entirely natural lay, and in the end we opted to pour a cap for a couple of reasons: 1. So the look of our patio would be symmetrical, and 2. A poured concrete cap = extra outdoor seating for entertaining in the summer months!

dry lay stone bench with form

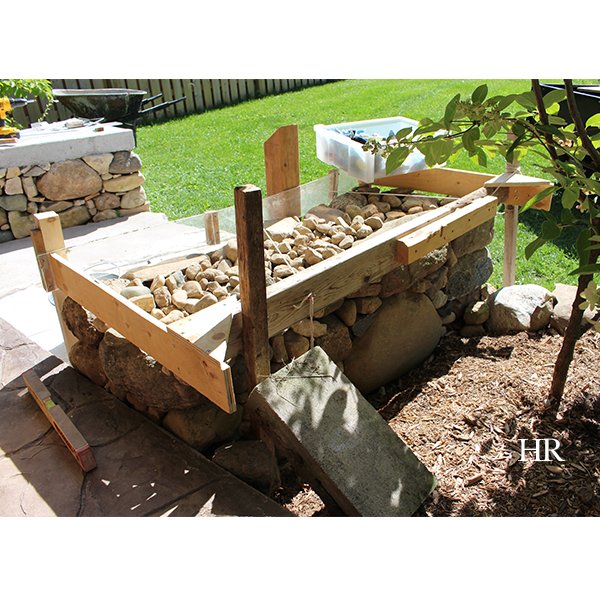
It required a lot of patience to build the form for the concrete. Wes ensured the run off angles were accurate by using a level every step of the way. He also used string to pull in the plexiglass side of the form to create the curved side of the concrete cap. He made several adjustments along the way as setting up the form was tedious work.

dry lay stone bench

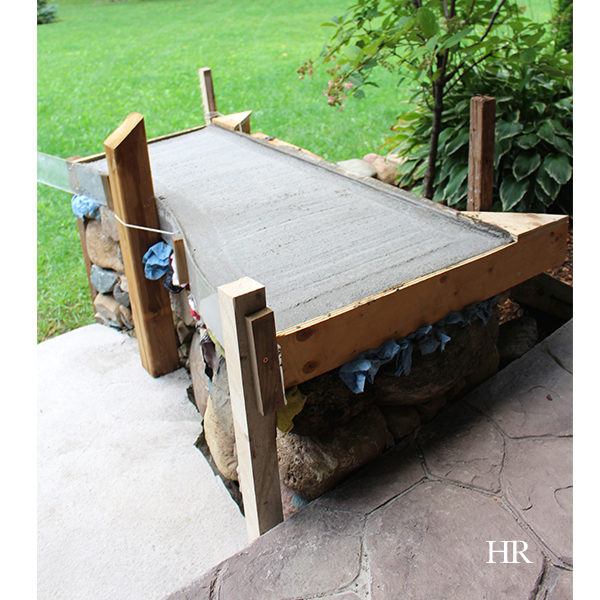
As you can see from the photo above, Wes used plexiglass for the one side of the form as we wanted to create a curved side that runs parallel with the natural shape of our patio stone. If you’re planning a project like this on your own property, we’d recommend ensuring that for your concrete cap you use the right ratio of water to cement. Add the water slowly to your mix. After the concrete cap was poured, Wes used a broom to create the brushed effect in the centre of the concrete, and used an edger to create the finished border.

Stay tuned for more pics of the finished product and our patio!


Tuesday

30

August 2016

Hope’s How-To: Build a Dry Lay Stone Bench

Written by , Posted in Gardening, Hope's How-To

We’ve had several compliments and questions regarding Wes’s masonry style when it comes to the dry lay stone benches he has been creating in our yard. He’s working on the third bench now to round out the project, and I can’t wait until it’s complete!

dry lay stone bench before

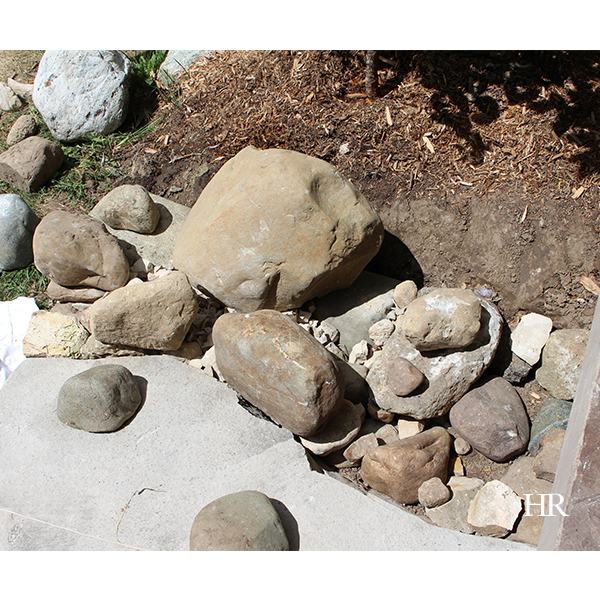
The above photo is before things really got started on the dry lay stone bench. Previously, we had a pile of large stones between the garden and slab stone step off our patio. To get the ground ready, Wes raked and levelled out the earth, and put down some gravel.

dry lay stone bench after

If you’re looking to create a DIY dry lay stone bench of your own, you will want to choose the stones for your bench based on their function in the wall system. In the above photo, you can see how Wes has carefully selected larger anchor stones for around the border of the stone bench, and used smaller, filler stones for the centre of the bench.

my husband cutting stones

Choose a stone according to its density. For example, if your DIY bench requires custom stone cutting, ala the photo above, you’ll want to choose limestone to work with it because it cuts more easily than other rock varieties. As you can see above, Wes is cutting a piece of limestone against a blue metamorphic rock (which is extremely dense and does not break easily).

choose rocks for your stone bench

Wes highly recommends laying stones out so you can see them before you get started with your stone bench project. Having a full view of the rocks available for your DIY will greatly assist you as you compose your stone bench. This practice also allows greater ease in experimenting with which stones will work best for the space in which you’re building.

For more advice and photos on how to build your own dry lay stone bench, check out our other completed DIY stone bench projects here, here, and here.