Hope Reflected

Encouragement and Hope from God's Word

diy Archive

Tuesday

19

September 2017

Hope’s How-To | Dry Lay Stone Border

Written by , Posted in Gardening, Hope's How-To

Several of you have asked why we haven’t shared any photos of what we’ve been working on in our garden and yard so far this year. Well, friends, it’s been a full summer! Wes and I have both commented to each other several times that we feel that we’ve hardly had any time to be at home this summer and just… be. Anyone else with us?!

How to build a stone border | See our latest garden stone border at hopereflected.com

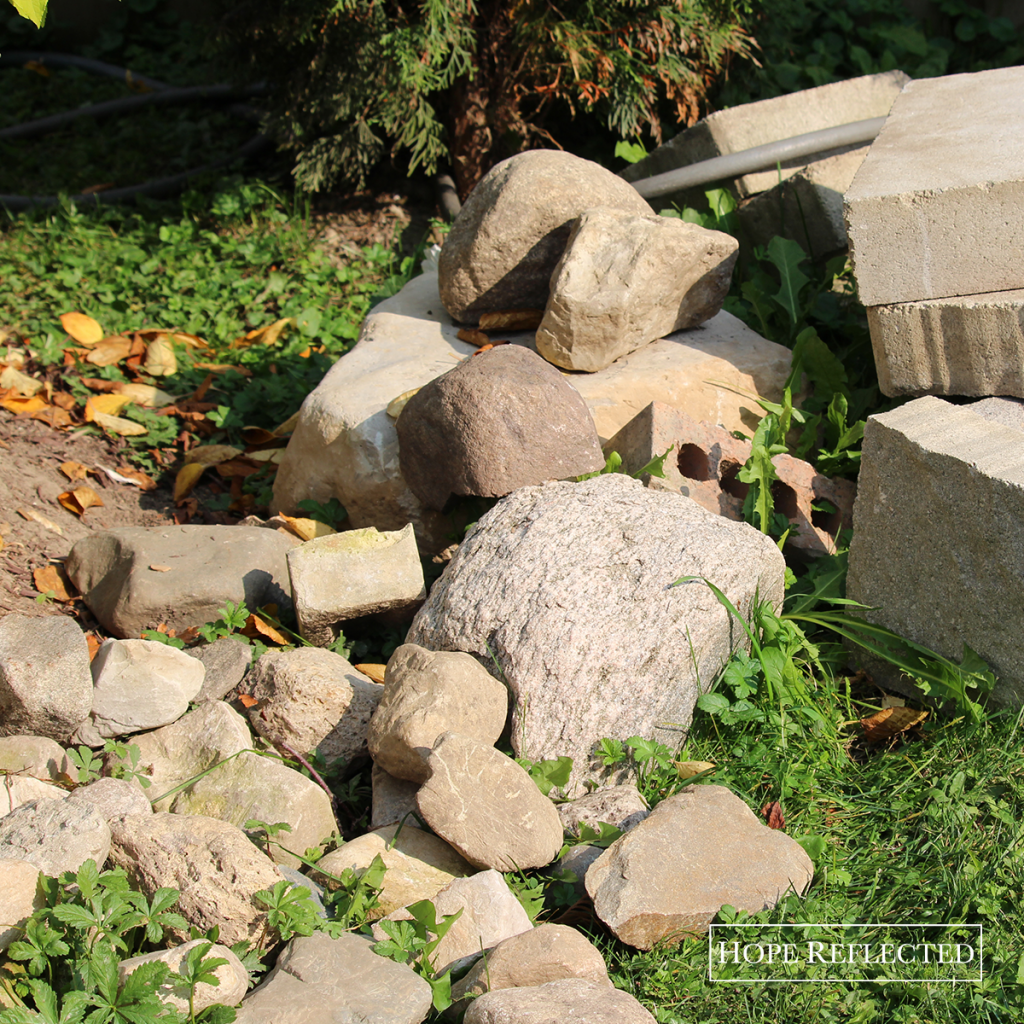
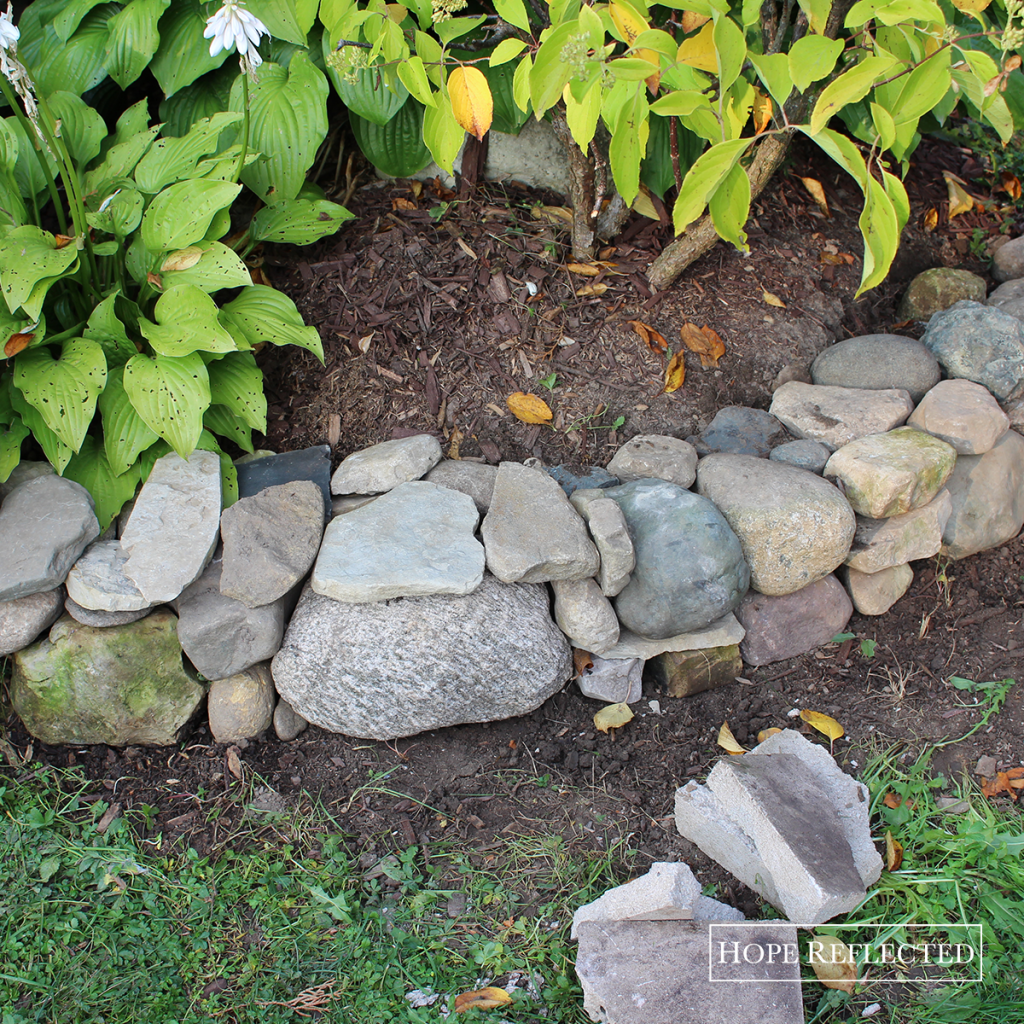
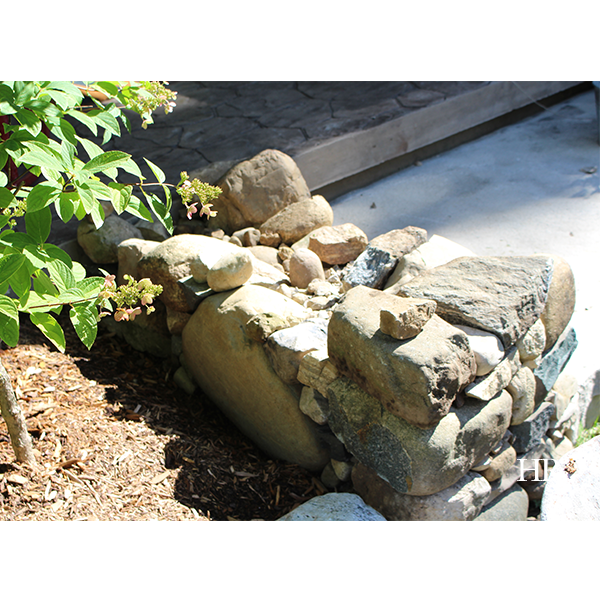
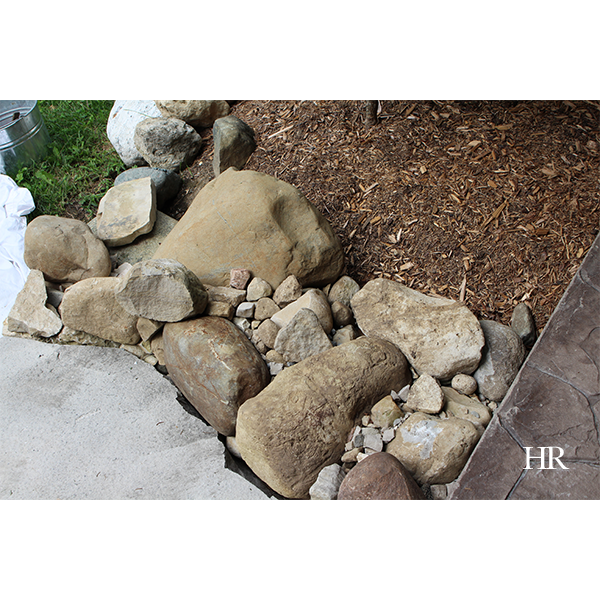
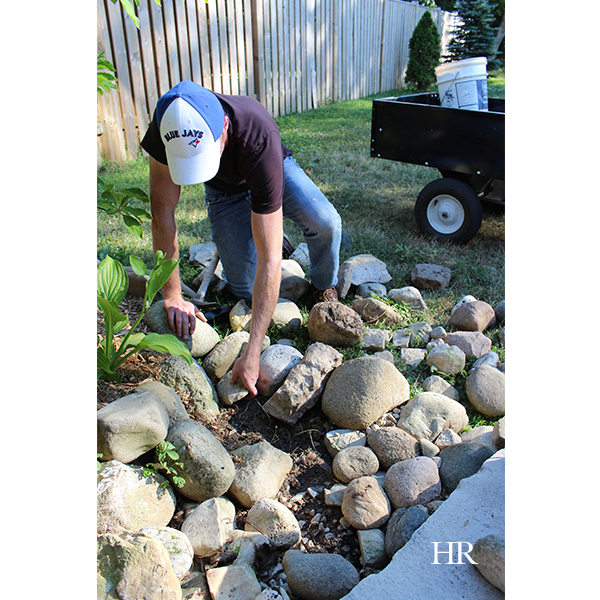
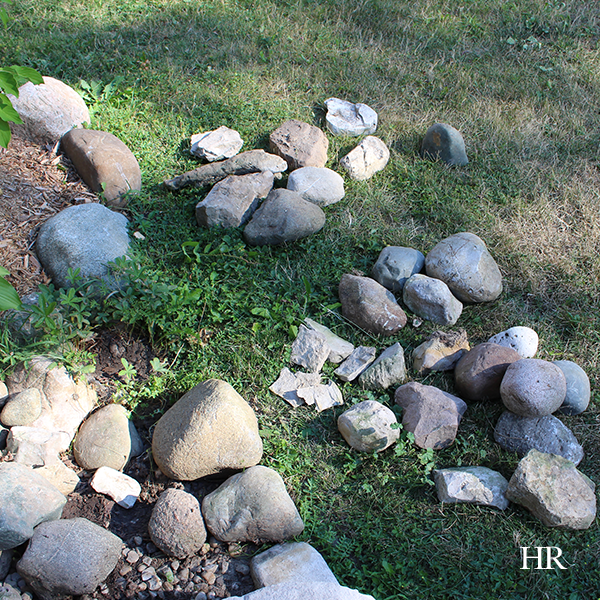
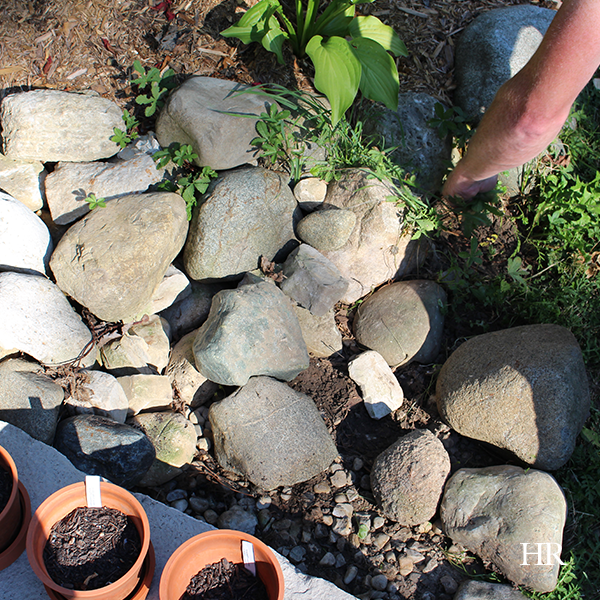
This past weekend, we were able to enjoy a brief respite from the world and spend some time outside in the garden and yard. Wes was able to get started on the next stone border in our garden, and I must say, it’s looking so beautiful I just had to share some pictures. Check out the “before” photo below.

Our latest garden stone border is on the blog! | See more at hopereflected.com

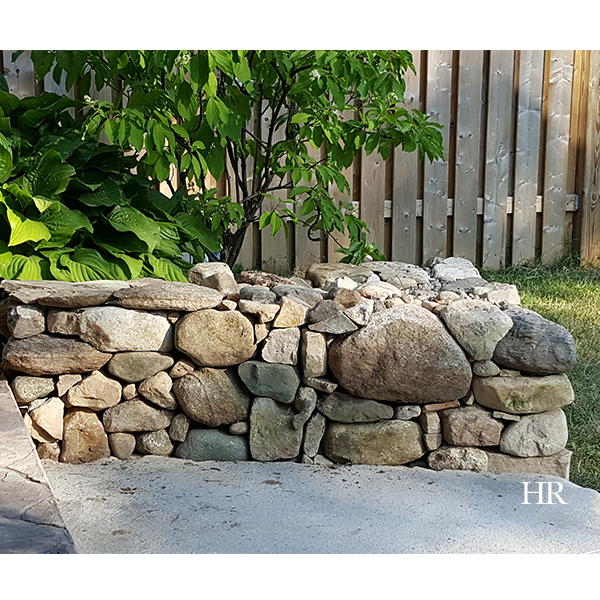
If you’ve been following along with our blog, you’ve already seen photos of the garden stone border that Wes completed last summer. Well, this summer, between concentrating on our hedge and planting more cedars, we’ve had little time to dedicate to finishing the dry lay stone border on the south side of our garden.

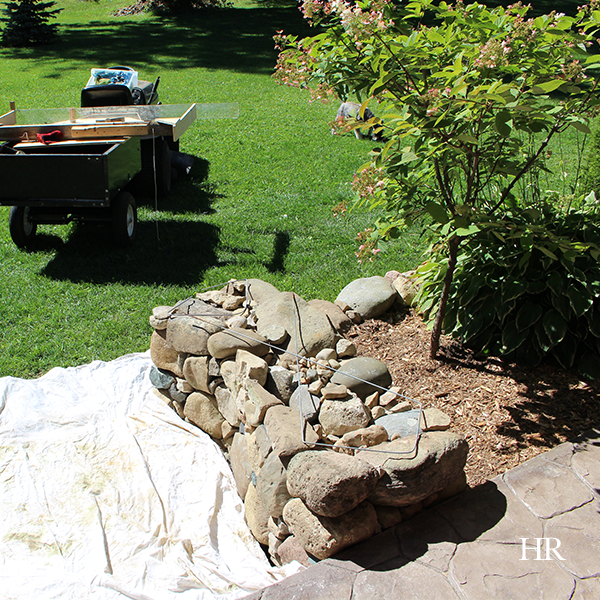
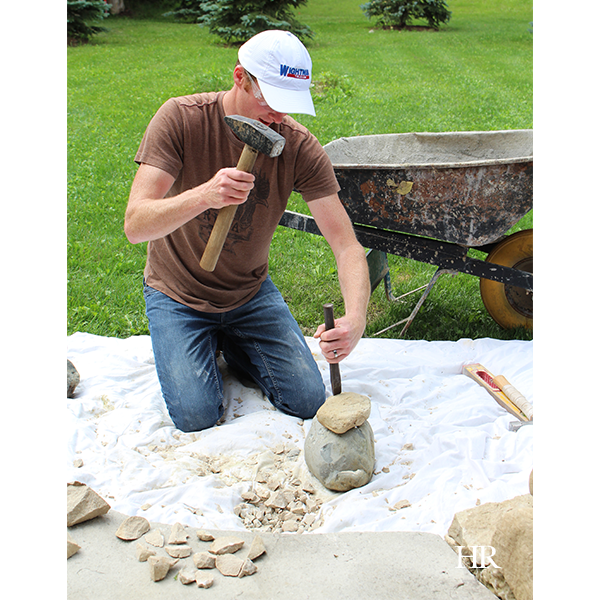
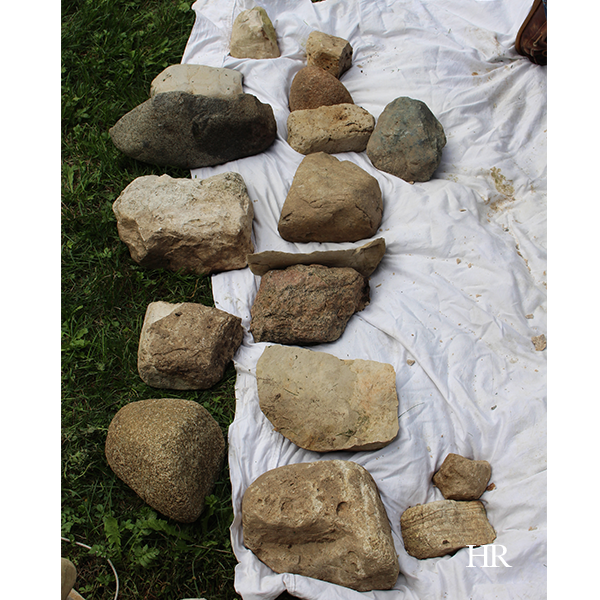
This past weekend, Wes went to work sorting stones and carving out the foundation for our latest dry lay stone border around the garden.

Our latest garden stone border is on the blog! | See more at hopereflected.com

Our latest garden stone border is on the blog! | See more at hopereflected.com

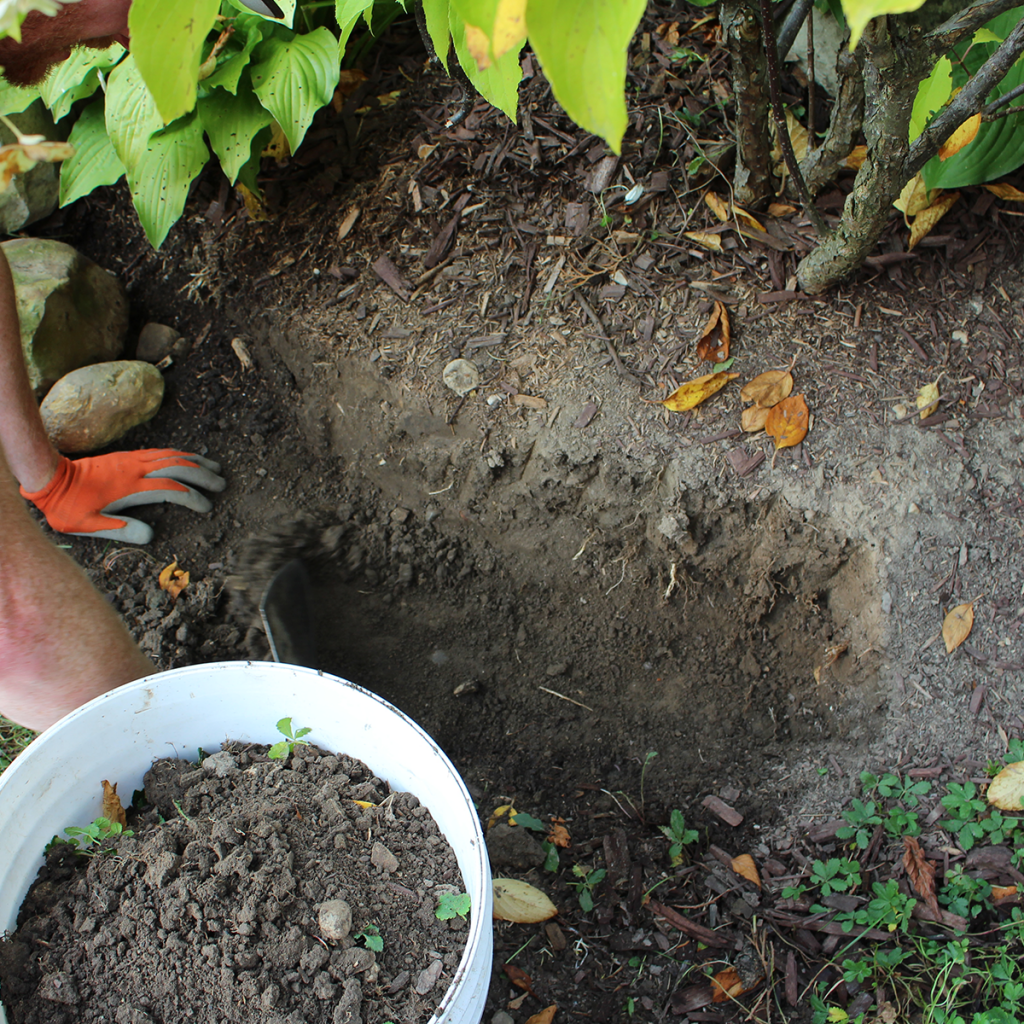
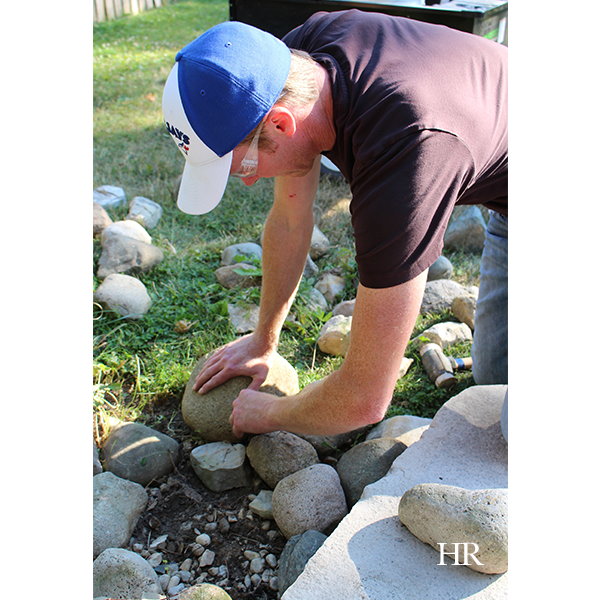
Wes started by cutting back the dirt bank about 10 inches to accommodate for the dry lay stone border. He dug out at an angle so there was positive slope towards the flower bed, which ensures that the stone actually sits into the bed rather than leaning out from the flower bed.

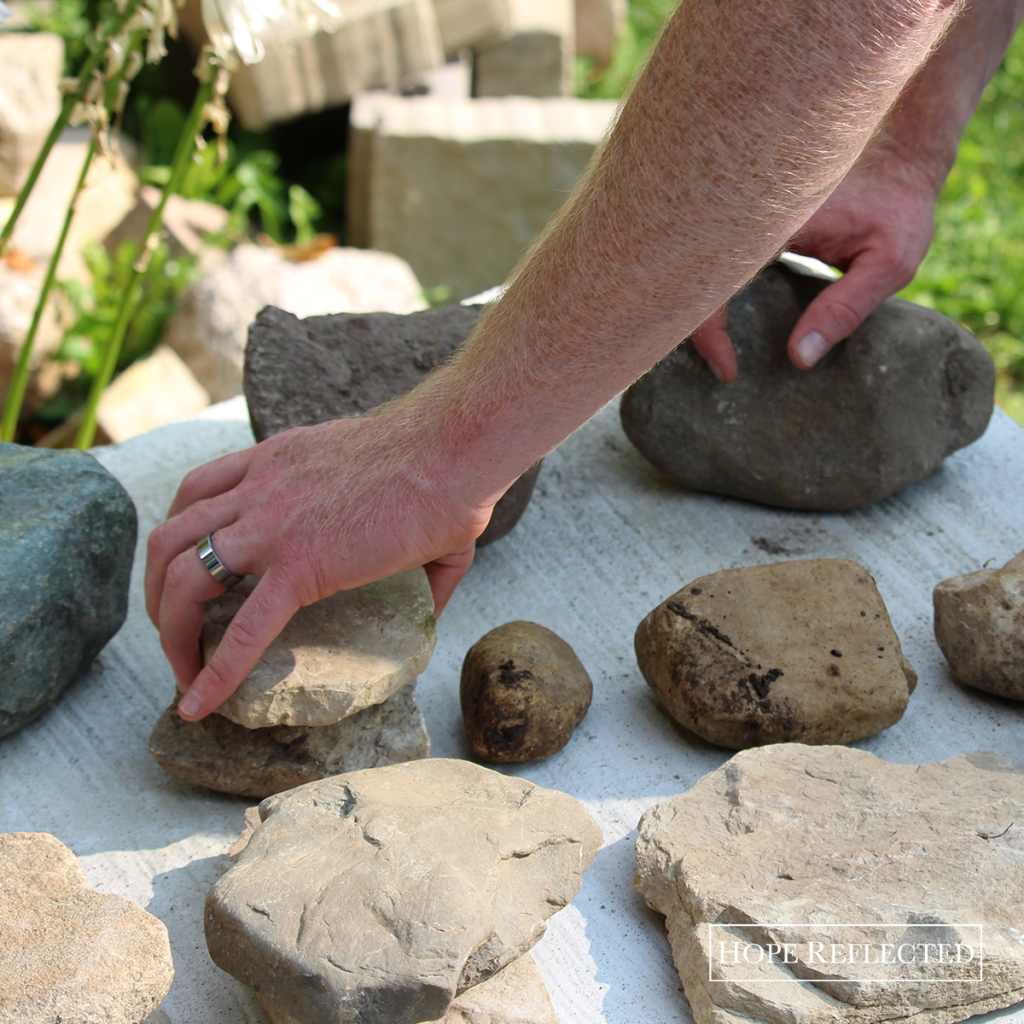
He placed the larger stones after taking a full inventory of the stones he had to work with (see photo above), and went to great lengths to place them evenly throughout the border wall. There was definitely some trial and error involved with creating the dry lay stone border. As Wes noted, the nice thing about this kind of application is that it does not have to be permanent; stones can be adjusted and moved if you get looking at them and feel you don’t that you don’t like the placement. In fact, areas can be entirely dismantled and reassembled to your liking. That’s the beauty of creating a dry lay stone bench or stone border for your garden! Wes says to think of the stones that you already have in your possession as pieces to your puzzle. There will be stones that sit better together; you just have to take the time to find them and to make the pieces work.

Our latest garden stone border. | See more at hopereflected.com

Our latest garden stone border. | See more at hopereflected.com

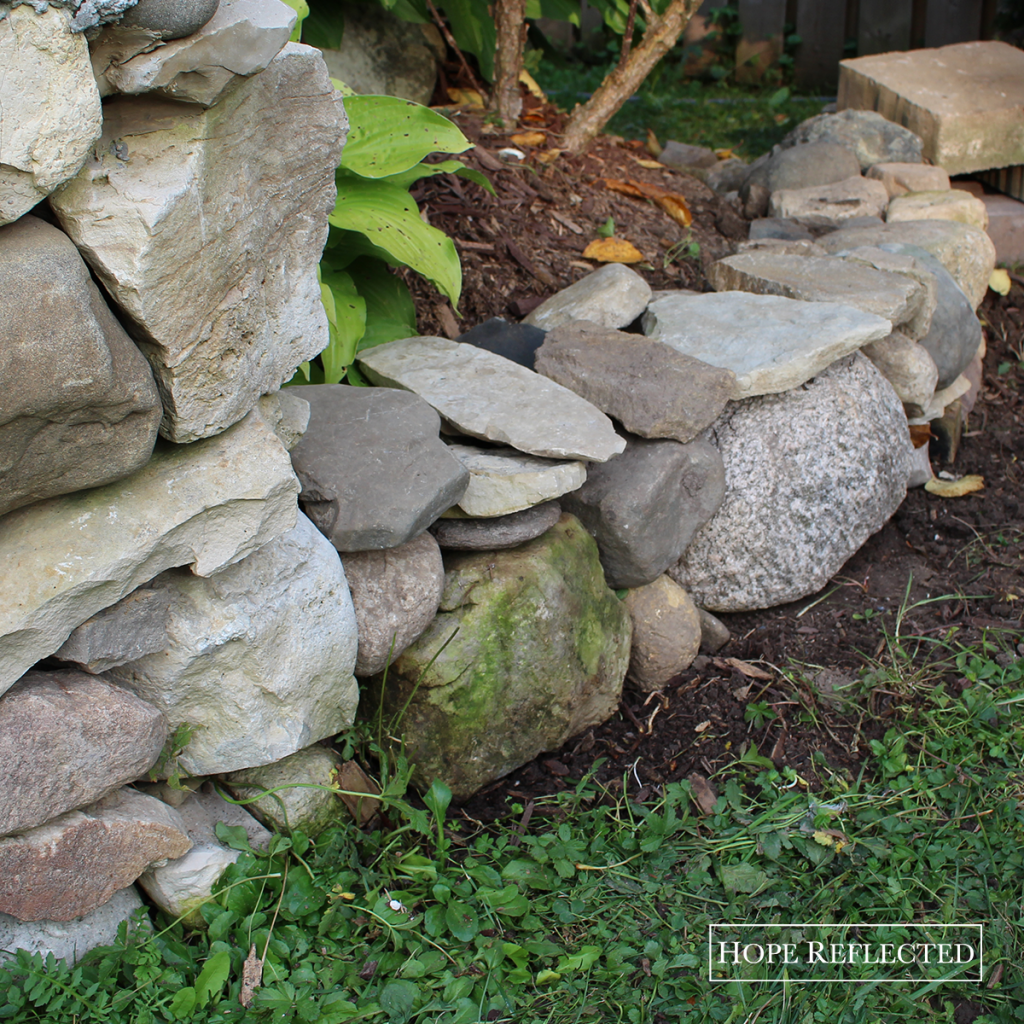
For us, this latest garden stone border project already makes a beautiful addition to our yard. Our latest border helps balance out the rest of the border around the garden. I love how Wes placed some of the larger stones evenly throughout the first level, and how he was so careful with the colour placement of the stones as well. I can’t wait to see the finished product!

Check out more photos of our DIY stone projects, stone garden benches, and stone borders and let us know what you think!


Tuesday

16

May 2017

Gardening: How to grow garlic

Written by , Posted in Gardening

how to grow garlic growing garlic

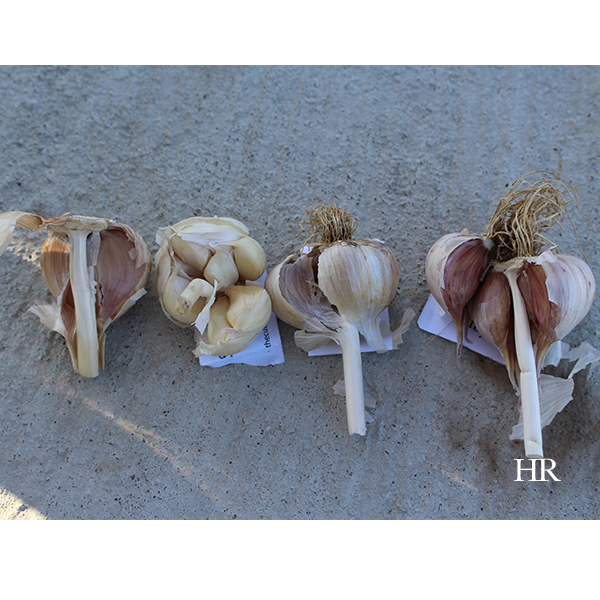
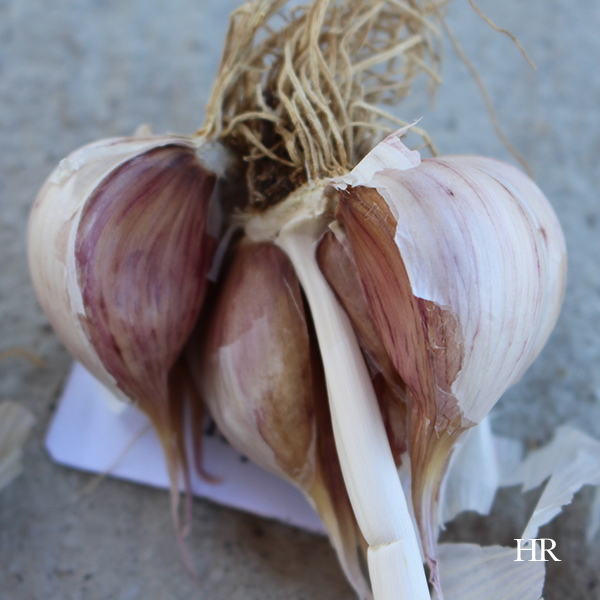
Last fall, we shared some tips about when to plant garlic in your garden as well as how to plant garlic. Now that the winter is over and we’re well into spring, we’d like to share some helpful and realistic tips on how to grow garlic.

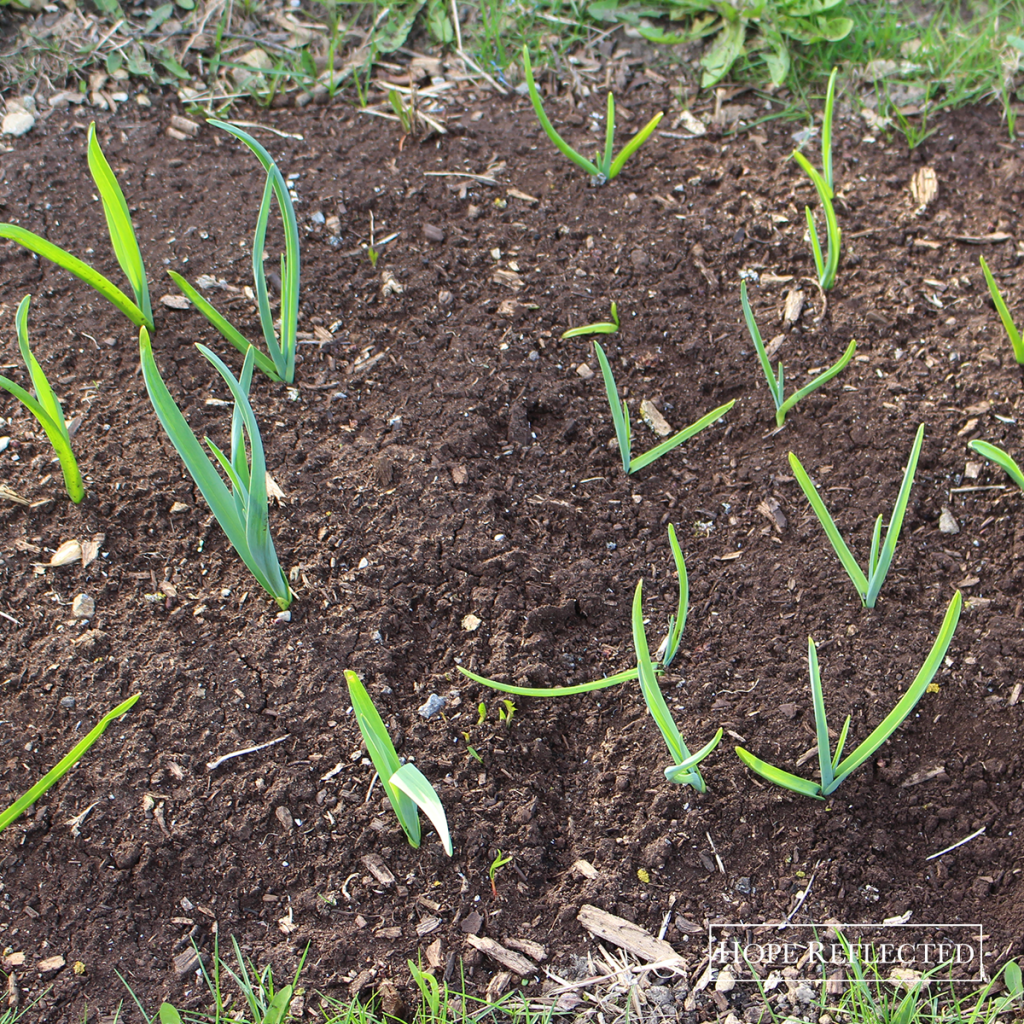
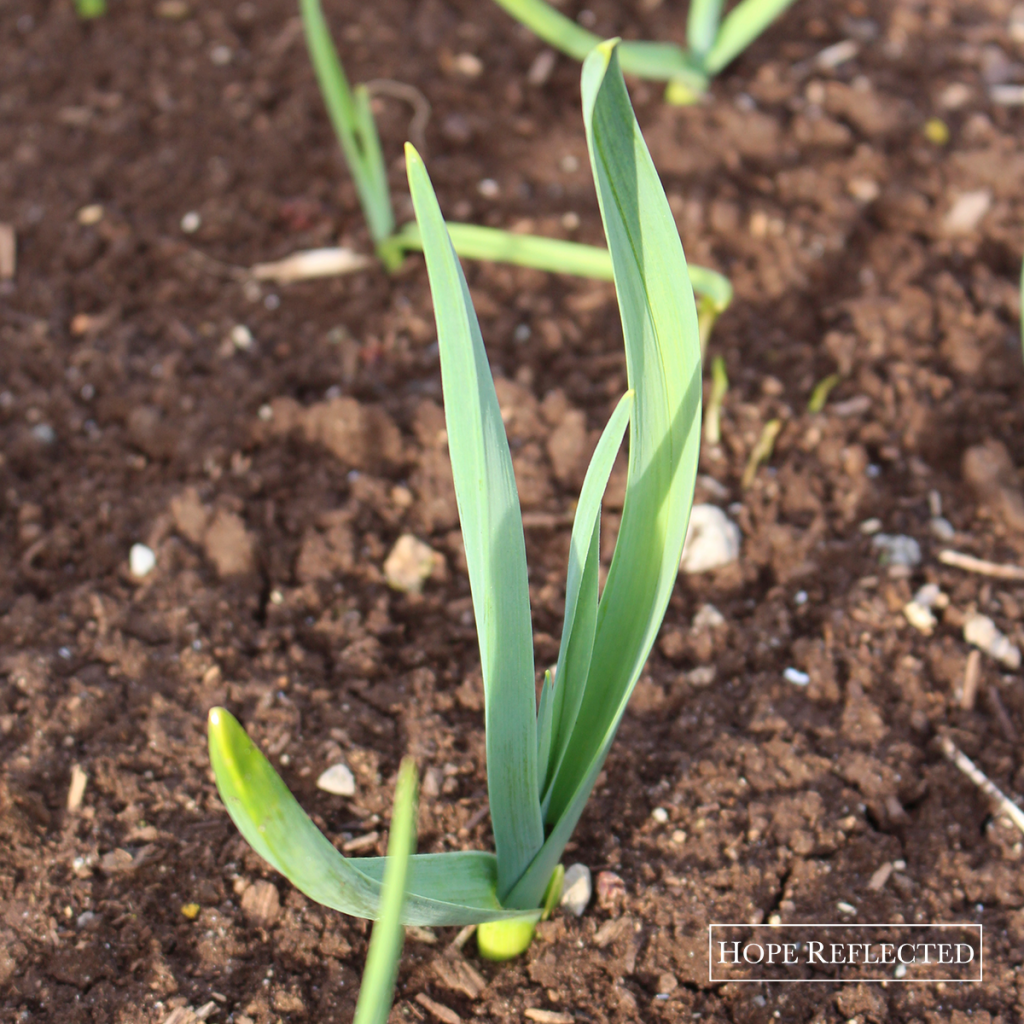
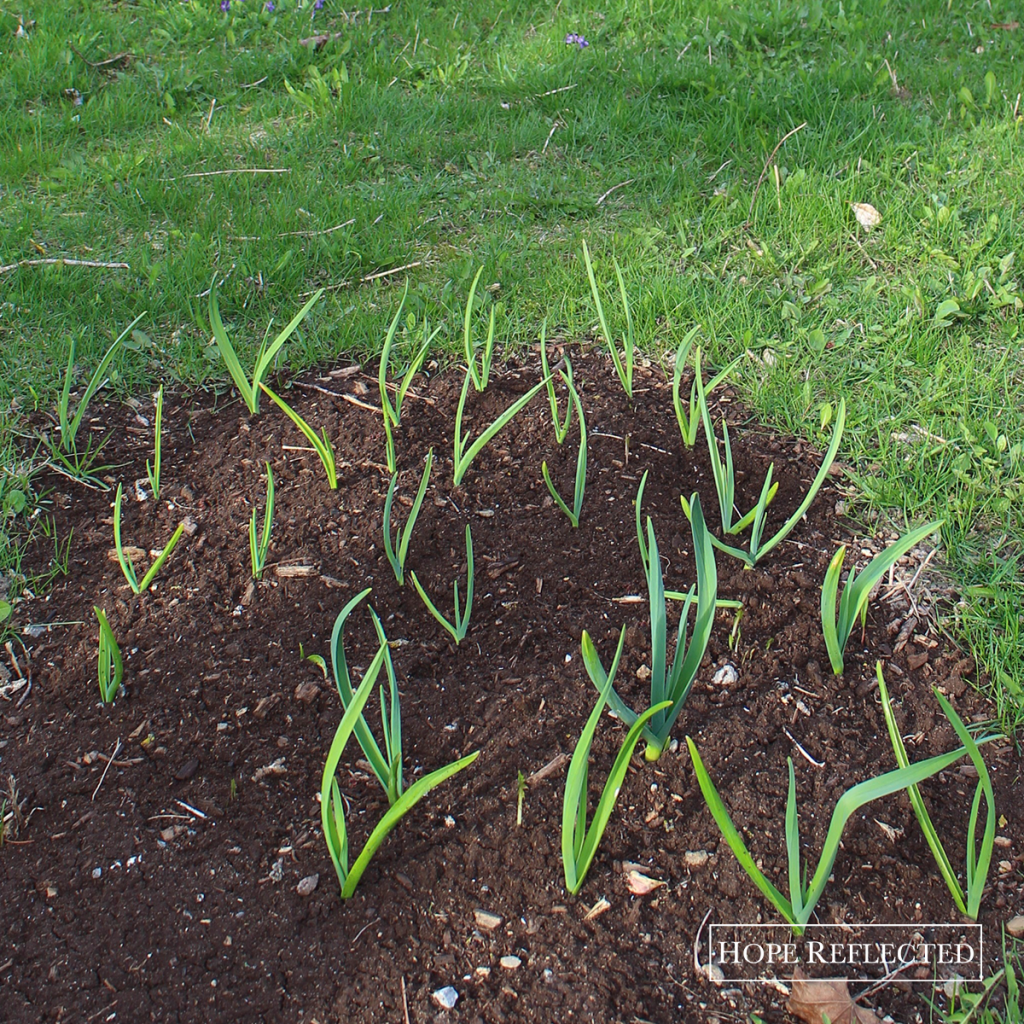
This is the first year that Wes and I are attempting to grow our own garlic. We planted the cloves last fall in an area of our yard that gets full sun. Now that warmer weather is upon us, we’re seeing the garlic shoots grow more and more each day. The photos shared in today’s post were taken about three weeks ago.

The varieties of garlic that we planted last fall will all harvest mid-summer, and we’re looking forward to enjoying the fruits of our labour later this season!

how to grow garlic growing garlic

Today, I’d like to share some practical advice with you when it comes to growing your own garlic. If you’re contemplating how to grow garlic, here’s what we’ve learned so far:

  • Record which variety of garlic is planted in which row of your garlic garden. I told you last fall that we were keeping track and were going to label each row of garlic in the spring, and do you think I can find our list anywhere?! The consolation is that we only planted four garlic varieties, and Wes and I are both confident the garlic is planted alphabetically (Israeli, Persian star, Sicilian, with a row of elephant garlic at the end) so we have that going for us.
  • Make sure you leave enough space between each clove of garlic. We heard from a seasoned source that if you plant your garlic cloves too close together, they can cluster. Wes and I spaced our rows of garlic about 6 inches apart, with about 4 to 6 inches between each clove. As you can see from the photos in today’s post, the shoots aren’t necessarily growing up evenly.
  • Depending on your taste preferences, you will want to water your garlic garden regularly. The more you water your garlic as it grows, the more mellow it will taste when you harvest it. On the other hand, the drier the season or the less you water your garlic, the more potent it will taste when you harvest it.

More to come as the season moves along! If you’re a seasoned gardener, what are your best practices for growing garlic?

how to grow garlic growing garlic

Tuesday

2

May 2017

Hope’s How-To: The Robins Are Back

Written by , Posted in Gardening

hope's how-to: Robins are nesting

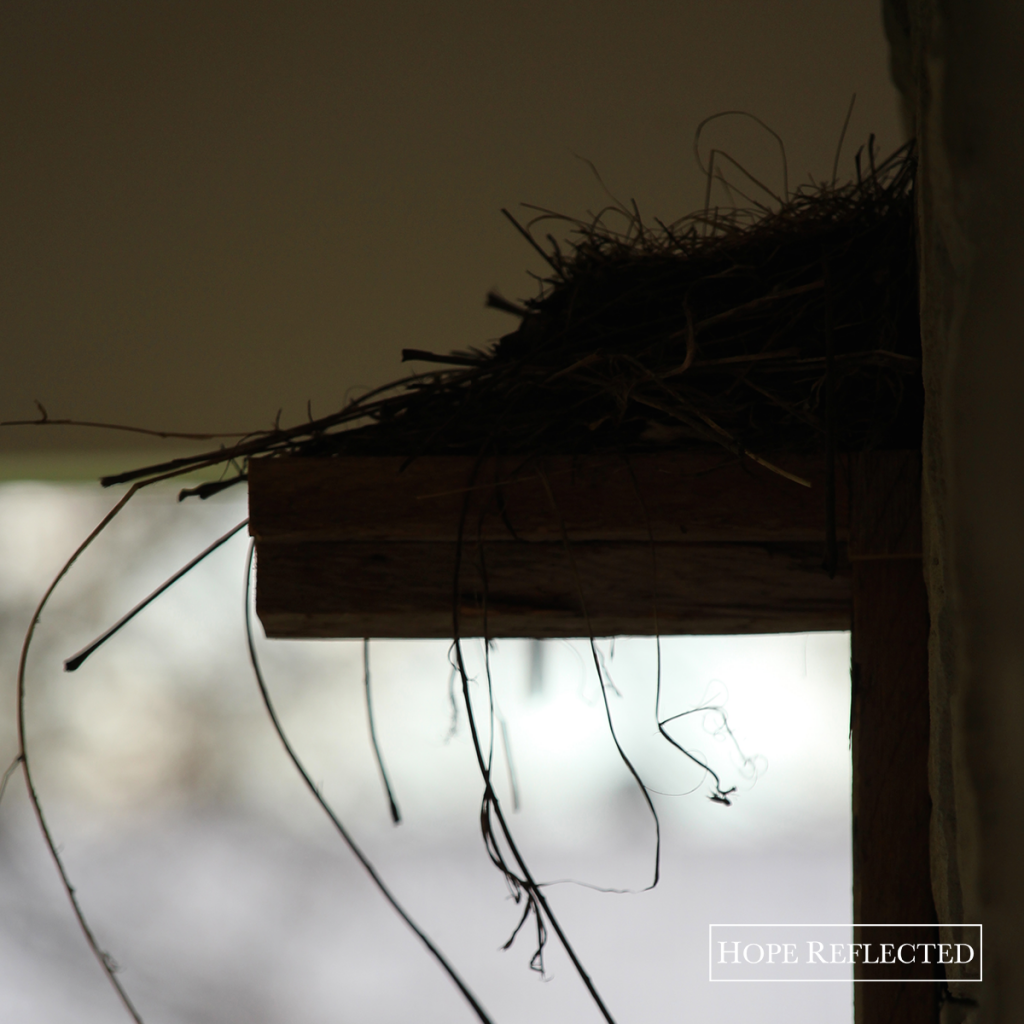
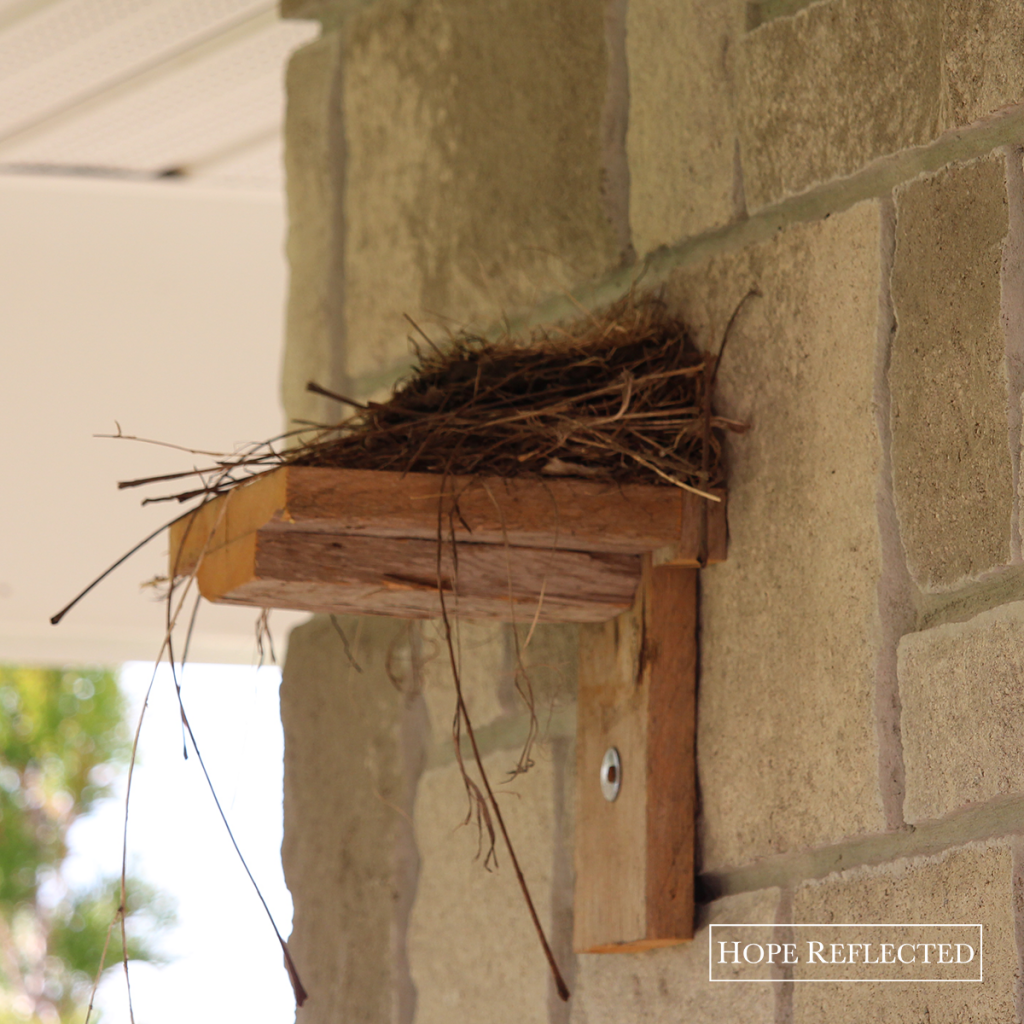
If you were following along on the blog last year, you read all about the family of robins that nested on the nesting shelf that Wes built me. Well friends, the robins are back! Wes and I were so excited to see on Saturday night that the robins have officially built their nest on our nesting shelf, and we are so looking forward to seeing another robin family grow and take flight right in our own yard.
A bit of back story for you: At the beginning of April, I noticed that there were some twigs on our nesting shelf. I knew these had to be recent, as after our robin family flew the coup last year, Wes and I disposed of the old nest and sprayed down the nesting shelf. I noticed one day that there were grackles up on top of the shelf. Concerned, and thinking that perhaps it was grackles and not robins using our shelf, I cleared off the shelf once again.

Three full weeks passed, and I waited patiently for the robins to nest. Nothing. Then, last week, I asked Wes to spray off the shelf again (lest the scent of the grackles was deterring a robin family from nesting). He did, and what do you know — we checked on Saturday night and in a span of less than 8 hours — the robins had built a whole nest!
hope's how-to: robin's nesting shelf

While it’s certainly not as neat as last year’s nest, it would appear that the robins are here to stay for the season. If you’re looking for ways to attract robins in your own yard, you should note that robins love blueberries (any berries, really). Also, if you’ve got a lawn that is more moist than dry (worms love moisture), you’re more likely to attract robins to your yard.

So far, it appears that our robins are making themselves at home. The robins have been busy around our yard, searching for worms, mating (I think?), and preparing to lay their eggs.

hope's how-to: robin's nesting shelf

Stay tuned for more photos as the season moves along. We are excited once again to be sharing the journey of the robin’s nesting shelf and robin family with you!

hope's how-to: robin's nesting shelf

For more on last year’s robins, click here.

Tuesday

31

January 2017

Planning Your Spring Garden

Written by , Posted in Gardening

The middle of winter is a great time to get dreaming about your spring garden! Wes and I have already started planning our outdoor projects for the warmer weather, and we are so excited for gardening this year. You may be wondering how to start planning your spring garden, or where to start, so here are some tips to get a head start on planning your outdoor living oasis.

Planning your spring garden doesn’t have to be hard, in fact, quite the opposite! It should be a fun experience; a time to take note of the outdoor projects you want to complete, and narrow down a list of what’s actually realistic for one season.

Tips on planning your spring garden:

1. Take note of the perennials already in your garden. This will help you determine what (if any) new varieties you want to introduce in the spring. Keep in mind that some perennials — such as hostas or peonies — expand and grow year after year. Unless you catch the peonies before they go to seed, expect more peonies this spring (and that’s a beautiful thing)!

planning your spring garden


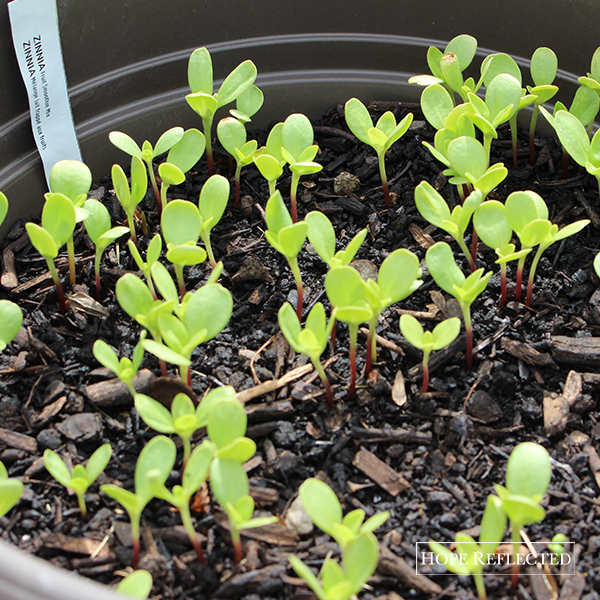
2. Determine what annuals you want to include in your garden. This can be as easy as looking online, browsing local seed catalogues, and figuring out what’s going to work for your outdoor space. Depending on the annual, you’ll want to get your seeds early, and possibly even start them indoors before the thaw. Last year, Wes and I tried our hand at a few different annuals. While our zinnias started out strong, in the end only the bachelor buttons survived. Prepare yourself by getting any potting supplies you’ll need for spring (we like to pot our annuals, as it makes for a portable garden).

planning your spring garden


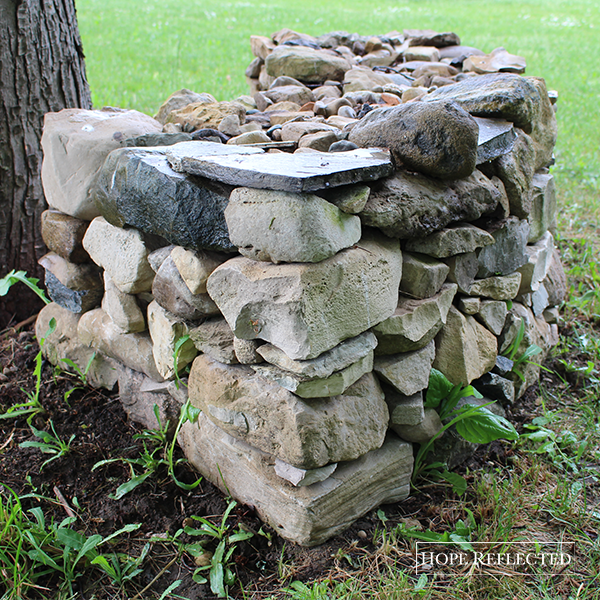
3. Start preparing for any major outdoor projects now. Many people have a misconception that planning your spring garden involves solely plants. Not so! If you’ve got dreams of building an outdoor patio or outdoor living area, get your plans completed now so when the weather breaks you can start strong! Last summer, Wes built a few dry lay stone benches, and also completed a dry lay border around our gardens. We had the supplies in hand long before the outdoor work actually got started.

planning your spring garden


4. Cultivate what you already have. It can be tempting when spring rolls around to get all excited about new plants and making changes to your property, and rightfully so! However, keep in mind while planning your spring garden that you need to care for what you have already planted. Cultivating a full and lush garden involves a lot of manual work, and consistent maintenance makes that work a little easier to manage. Did you trim back any perennials in the fall and do a final weed? If not, get ready to weed your garden and trim back any old growth before your plants come out of dormancy.

planning your spring garden

If you’re looking for more tips on how to get planning your spring garden, head over to my Pinterest and check out my Gardening board.

Tuesday

8

November 2016

Gardening: How to Plant Garlic

Written by , Posted in Gardening

Last week, we shared some tips about when to plant garlic in your garden. We thought it would be neat to share our experience of planting our first garlic garden, and provide some tips on how to plant garlic (and then next Summer we’ll follow up and see if it worked).

how to plant garlic

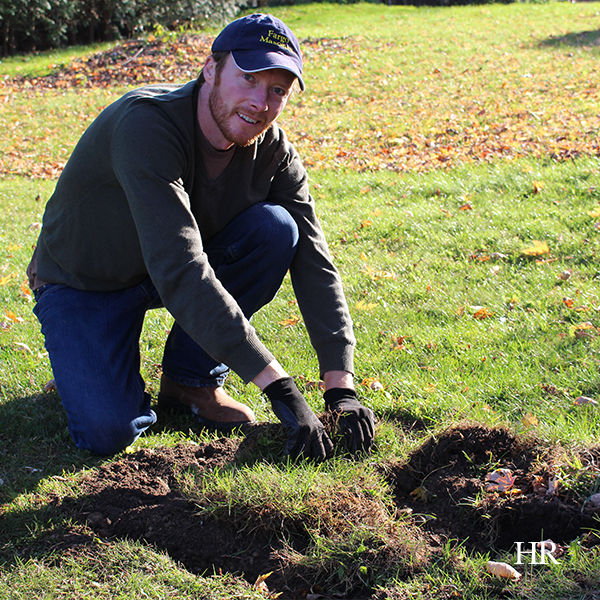
First things first, we had to find the right spot in our yard. Good advice when you’re selecting a spot in your garden or yard to plant a garlic garden, choose a location that gets full sun. Wes removed the sod and worked the dirt, before adding black earth to the garden. You want your soil to be dug over. If you’re working with land that’s sandy or clay-like, that’s OK!

how to plant garlic

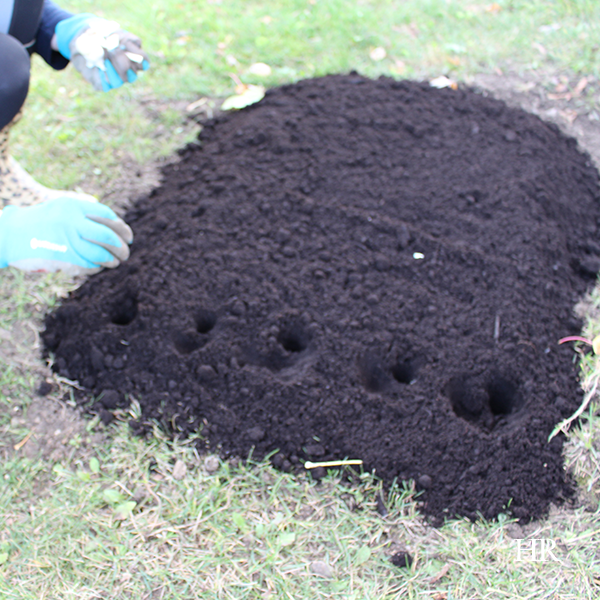
As we mentioned last week, garlic does best if you plant it in the Fall. In the garden, we created small pockets 4 to 6 inches apart. We also dedicated each row in the garden to a specific variety of garlic (more on that below).

how to plant garlic

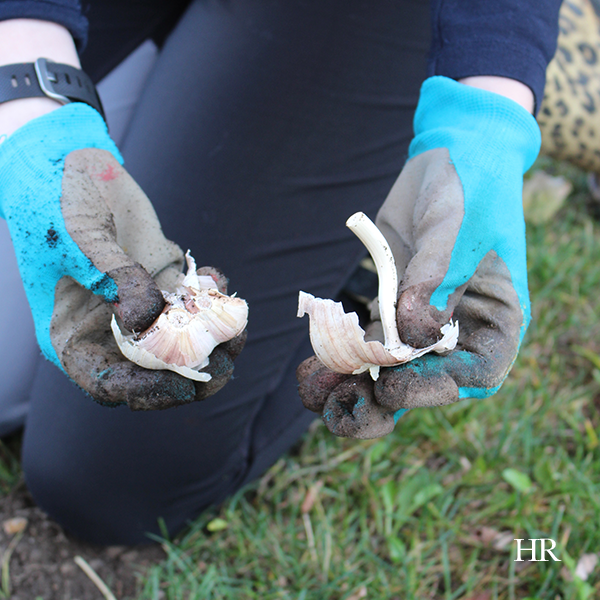
Wes and I did some research before hand to see best practices on how to plant garlic. While some experts advise you should break your garlic cloves apart several days before planting, others advise that breaking the cloves apart too early will cause the cloves to dry out. Up to you, but we opted to wait until just before planting to break the cloves apart. Also, don’t peel the husk, leave the paper on the garlic cloves for planting.

how to plant garlic

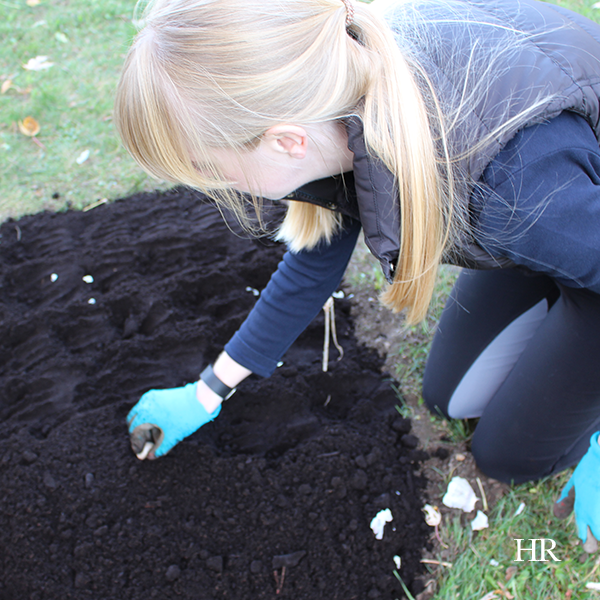
When planting your garlic, place each clove about 2 to 4 inches deep in the ground. You’ll want to make sure the flat root is at the bottom, with the stem of the garlic clove facing up. Again, we planted our garlic, dedicating each row to a different variety. Rows should be about 6 inches apart, with about 4 to 6 inches between each clove.

how to plant garlic

Another important tip when considering how to plant garlic in your garden, is the fact that you shouldn’t plant just any garlic. We heard from several seasoned sources how garlic bought at the grocer’s doesn’t grow well (or sometimes at all) in the garden. The varieties of garlic that Wes and I planted this year were all purchased at the Stratford Garlic Festival.

Here’s some information about the different garlic varieties we planted:

  • Israeli garlic: A hard-neck garlic that harvests mid summer, Israeli garlic has white skin with purple flushes. Israeli garlic has up to 10 cloves per bulb.
  • Persian star garlic: A hard-neck garlic that harvests mid summer, Persian star garlic has purple-striped skin. Persian star garlic usually has about 8 cloves per bulb.
  • Sicilian garlic: A soft-neck garlic that harvests mid summer, Sicilian garlic has white skin. Sicilian garlic can have up to 14 cloves per bulb.

We documented which row each garlic variety is planted, and next Spring we’ll label the rows so we can keep track of which varieties thrive and grow best.

how to plant garlic


Tuesday

25

October 2016

Gardening: How to Grow Cockscomb

Written by , Posted in Gardening

cockscomb

Low maintenance, fragrant, and absolutely vibrant, cockscomb are a flower oft-overlooked and taken for granted. Cockscomb, also known as Wool Flowers, or even Brain Celosia (because that sounds appealing), are beautiful blooming annuals that grow to be 12-30 inches in height.

Wes and I first came across these beauties at Stratford’s Garlic Festival this past September, and, you guessed it; we’re growing cockscomb next year!

While Stratford’s Garlic Festival is most widely known for its garlic (obviously), one of the booths we passed by was selling cockscomb stems for $1.00 each. Needless to say, after hearing a bit about the blooms and how you can save the seeds and plant the following seeding season, we purchased two with the intent of including them in our Spring 2017 garden.

Since mid-September, we’ve had our cockscomb blooms hanging upside down in a dry place, with a bowl beneath. After drying, the seeds fall from the cockscomb bloom, and can be planted the following season.

cockscomb

As you can see from the photo above, after a month and a half of drying, the cockscomb drops its seeds (the seeds come from the part of the plant beneath the coloured bloom but before the stem).

Cockscomb flowers usually come in four colour varieties: Yellow, pink, orange, and white. Interestingly, the name cockscomb comes from the similarity to a cock’s comb on a rooster’s head.

cockscomb

Aspiring gardener tip: When you’re drying your cockscomb, make sure you place a bowl beneath the plant in which to let the seeds fall. As you can see from the photo above, after about a month and a half, there are plenty of seeds collected or our garden next Spring. (Note: The seeds are the round black pieces, the lighter pieces are the seed casing or shells.)

cockscomb

I am very excited to see what happens next Spring when we plant the seeds rom our first-ever cockscomb plants. Cockscomb flowers are beautiful annuals, and it will be interesting to see how our latest gardening experiment turns out!

If you’re planning to plant your own cockscomb seeds next Spring, here are some tips:

  • Plant your cockscomb flower seedlings into moist soil in late spring.
  • You may opt to start your seedlings indoors about 6 to 8 weeks before your region’s last frost.
  • Outdoors, plant your seedlings about 8 inches apart.
  • Cockscomb seedlings grow best in full sun.

Tuesday

27

September 2016

Hope’s How-To: Build a Dry Lay Stone Bench, Part 2

Written by , Posted in Gardening, Hope's How-To

Hope's how-to: Build your own dry lay stone bench

As you’ve read previously, Wes has completed two dry lay stone bench projects in our yard. In August, he started working on a third, just off our patio, and we’re finally getting around to posting more photos of the whole process. The photo above shows the dry lay bench when the yard-facing end was complete. Wes notes that if you’re building your own dry lay stone bench, it’s important to consider that each layer of the bench should be completed at the same time for structural strength.

dry lay stone bench

This is a photo from our patio vantage point, looking at the completed dry lay bench, just before Wes poured the concrete cap. Wes was very careful to maintain the angle of the bench, taking into consideration which way we want the water to run off the bench (away from our home and patio). During the building of the bench and pouring of the concrete cap, our patio stone was covered to prevent any staining or damage.

dry lay stone bench

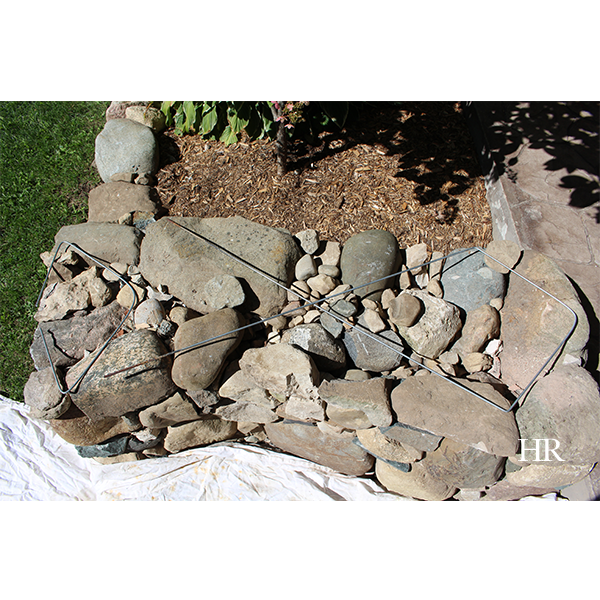
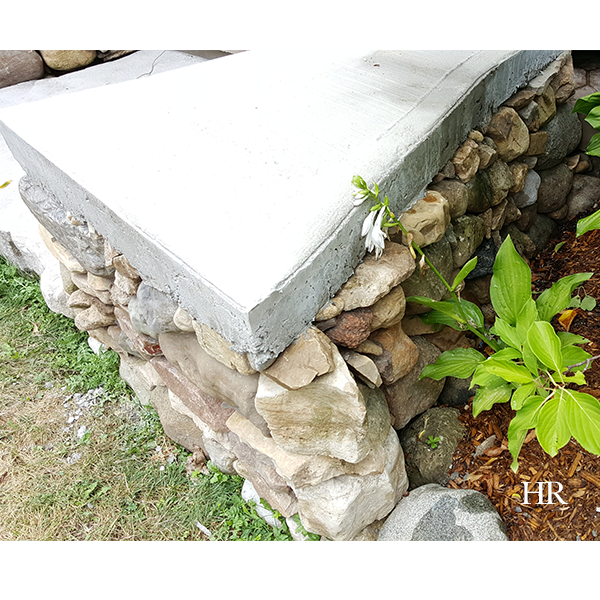
In preparation for pouring the concrete cap, Wes utilized some old wire from a sign in substitution for rebar and to reinforce the strength of the concrete cap. We debated whether we actually wanted to pour a cap on this bench, or just leave it as an entirely natural lay, and in the end we opted to pour a cap for a couple of reasons: 1. So the look of our patio would be symmetrical, and 2. A poured concrete cap = extra outdoor seating for entertaining in the summer months!

dry lay stone bench with form

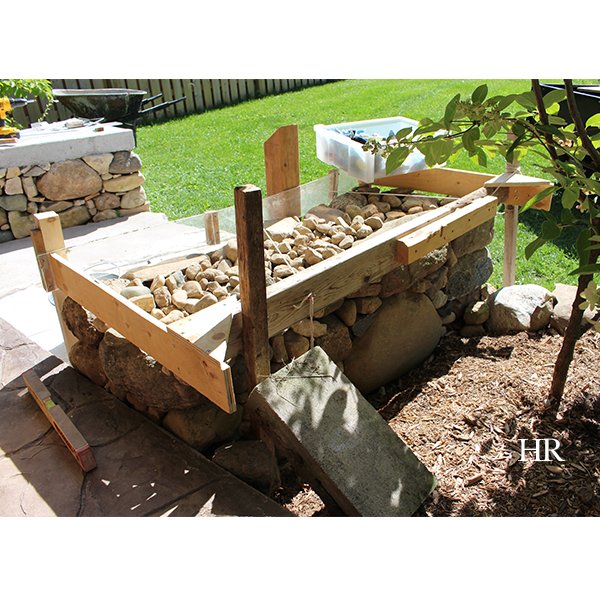
It required a lot of patience to build the form for the concrete. Wes ensured the run off angles were accurate by using a level every step of the way. He also used string to pull in the plexiglass side of the form to create the curved side of the concrete cap. He made several adjustments along the way as setting up the form was tedious work.

dry lay stone bench

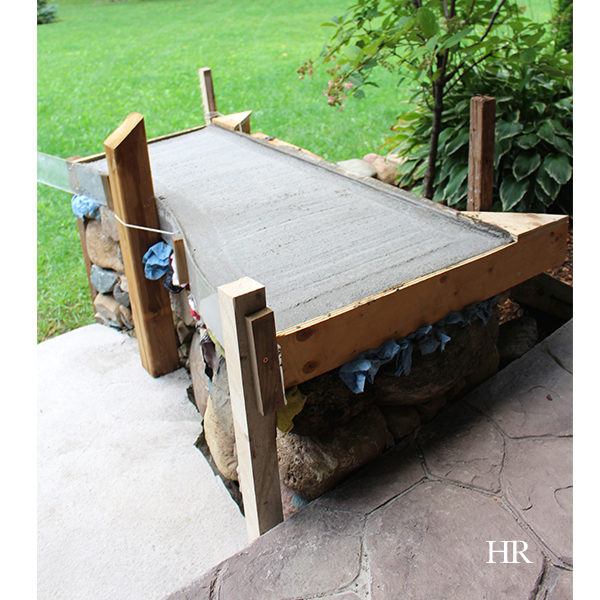
As you can see from the photo above, Wes used plexiglass for the one side of the form as we wanted to create a curved side that runs parallel with the natural shape of our patio stone. If you’re planning a project like this on your own property, we’d recommend ensuring that for your concrete cap you use the right ratio of water to cement. Add the water slowly to your mix. After the concrete cap was poured, Wes used a broom to create the brushed effect in the centre of the concrete, and used an edger to create the finished border.

Stay tuned for more pics of the finished product and our patio!


Tuesday

30

August 2016

Hope’s How-To: Build a Dry Lay Stone Bench

Written by , Posted in Gardening, Hope's How-To

We’ve had several compliments and questions regarding Wes’s masonry style when it comes to the dry lay stone benches he has been creating in our yard. He’s working on the third bench now to round out the project, and I can’t wait until it’s complete!

dry lay stone bench before

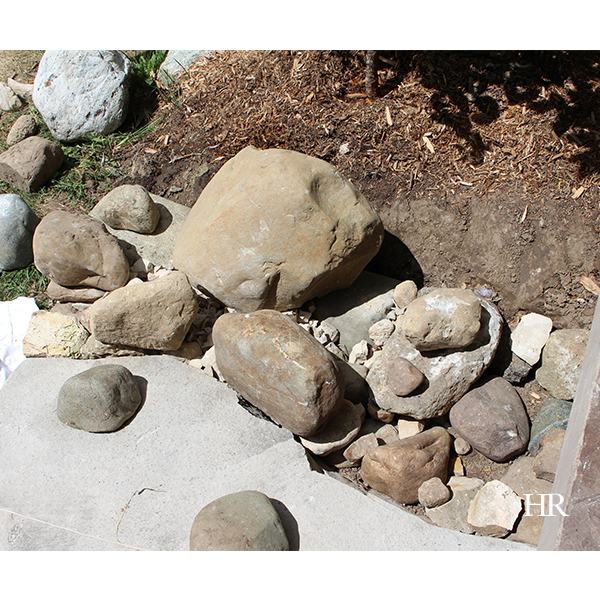
The above photo is before things really got started on the dry lay stone bench. Previously, we had a pile of large stones between the garden and slab stone step off our patio. To get the ground ready, Wes raked and levelled out the earth, and put down some gravel.

dry lay stone bench after

If you’re looking to create a DIY dry lay stone bench of your own, you will want to choose the stones for your bench based on their function in the wall system. In the above photo, you can see how Wes has carefully selected larger anchor stones for around the border of the stone bench, and used smaller, filler stones for the centre of the bench.

my husband cutting stones

Choose a stone according to its density. For example, if your DIY bench requires custom stone cutting, ala the photo above, you’ll want to choose limestone to work with it because it cuts more easily than other rock varieties. As you can see above, Wes is cutting a piece of limestone against a blue metamorphic rock (which is extremely dense and does not break easily).

choose rocks for your stone bench

Wes highly recommends laying stones out so you can see them before you get started with your stone bench project. Having a full view of the rocks available for your DIY will greatly assist you as you compose your stone bench. This practice also allows greater ease in experimenting with which stones will work best for the space in which you’re building.

For more advice and photos on how to build your own dry lay stone bench, check out our other completed DIY stone bench projects here, here, and here.

Tuesday

16

August 2016

Dry Lay Stone Bench, Patio Edition, Part 1

Written by , Posted in Gardening

If you’ve been following along, earlier this Spring, Wes built the most beautiful DIY dry lay stone bench by one of the large trees in our yard. You can see the progress here and here, and now, he’s working on another stone bench, this time by our patio.

the beginnings of a dry lay stone bench

When he suggested the idea, I was all for it. Wes and I both love the old European, timeless feel of a dry lay stacked stone bench. There’s something so captivating about the ancient art of dry laying stones. Wes has a real talent in this area, and I can’t wait to show you the finished product.

marking the outline of our dry lay stone bench

Since we already had a pile of stones by the patio, Wes took some time to reconsolidate the collection according to their shape (and use) and prepare the foundation. He kept the larger, more flat rocks on the bottom to support the overall bench (like a float).

selecting stones for the dry lay bench

The art of dry lay stone stacking involves using smaller wedge-shaped (pins) stones to pin up the larger boulders. If you’re planning to try a DIY project like this in your own yard, best practice is to always prep your foundation first (level out dirt, add smaller gravel, pebbles, and then test which stones will work best in the system).

selecting stones for our dry lay bench

A good rule of thumb to remember when building a dry lay stone bench is that every rock or stone has its place. In the photo above, to the right of Wes’s hand, is a long stone called a through. Throughs stabilize the wall by tying the exterior weight to the interior weight of the stone system. (The longer the better.)

dry lay stone bench before the cap is poured

When he’s building a dry lay stone structure, Wes puts emphasis on the positive slope of the stones leaning in to one another towards the centre of the wall (or in this case, bench). This way, the bench or wall is always leaning into itself. Walls created from a dry lay or “drystone” lay have stood for hundreds of years in Europe and are still standing today. You just require the right foundation on which to build.

dry lay stone bench with cement cap

How you complete your DIY dry lay stone wall or bench is personal preference. Because of the location of proximity to the sitting area on our patio, we thought it wise to complete our dry stack stone bench with a cement cap. Bonus: Extra seating when company comes over! If you are planning to pour a concrete cap, be sure to “hoard” materials between the top stones on your wall that are round. This will prevent any concrete from running and will preserve a clean edge for your cap.

Tuesday

5

July 2016

5 Inspiring Outdoor Fire Pits to Add to Your Back Yard

Written by , Posted in Gardening

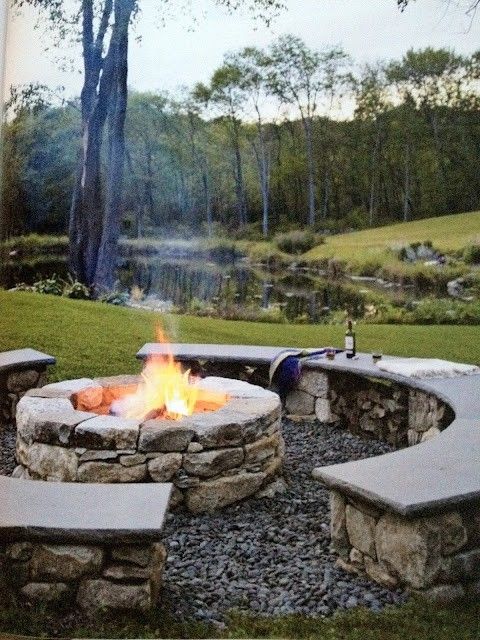
With Summer in full swing, we’re spending as much time outdoors as possible. One thing on the horizon is a fire pit, if ever we can find the time! We’re big fans of natural stone, so planning our fire pit does not involve any kind of pre-fab “kit”. Rather, we’re considering a dry lay, similar to the dry lay stone bench that Wes has been working on. Check out my Outdoor Living board on Pinterest for more fire pit inspiration, and in the meantime, these are 5 amazing fire pits that have really got me feeling inspired!

1. Fire Pit by the water. I’m not a huge fan of pea gravel, but I do love the set up of this fire pit. The sectioned-off area creates definite separation from the grass, and I absolutely love the dry lay of the actual fire pit. Accented with some fantastic colonial red chairs and log side tables, this fire pit is sure to be a spot for making memories.

fire pit

img via Fieldstone Hill Design Darlene Weir

2. Fire pit and bench. Outdoor seating doesn’t always have to be done with chairs, so it makes complete sense that this fire pit has a complementary surround in the same style. Again, I’m not a huge fan of gravel, but in this situation it works.

fire pit

img via indulgy.com

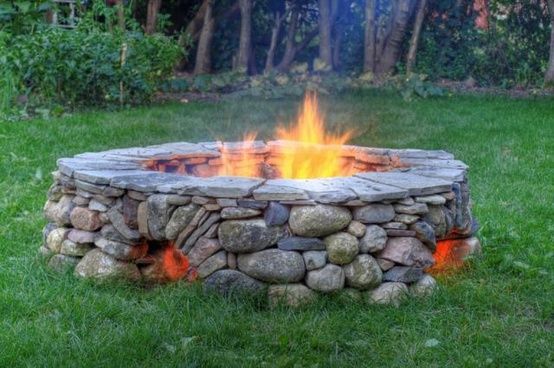
3. Dry lay fire pit. This fire pit is amazing! Check out the intricate details that went into this fire pit. It features some detailed arches and bottom vents to keep air flowing and fire glowing. Absolutely love this set up, and I think it would look great with a flagstone surround.

fire pit

img via Jessica Little House Big Heart

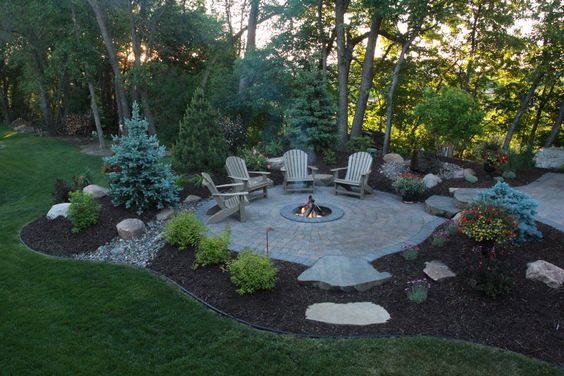
4. Flat and flush fire pit. While I’m more a fan of a fire pit that really stands out, I also appreciate the simplicity of this fire pit, which lays almost flush with the interlocking stone surround. There’s something to be said of this circular set-up, and I especially like that it’s at the end of a walk out with one stone step. Complementary landscaping around finishes the look and adds privacy.

fire pit

img via sunlitspaces.com

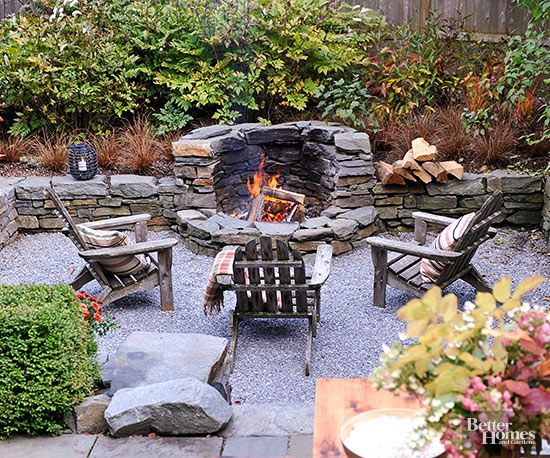
5. Built in fire pit. Speaking of privacy, this fire pit is actually built into a stone wall surround with some serious foliage behind. For a property on the road or bordering another home, this set up would be ideal. The stone wall surround means extra seating, and the open front of this fire pit provides plenty of heat.

fire pit

img via Better Homes and Gardens