Hope Reflected

Encouragement and Hope from God's Word

garden Archive

Tuesday

4

October 2016

Garden Stone Border

Written by , Posted in Gardening

garden stone wall

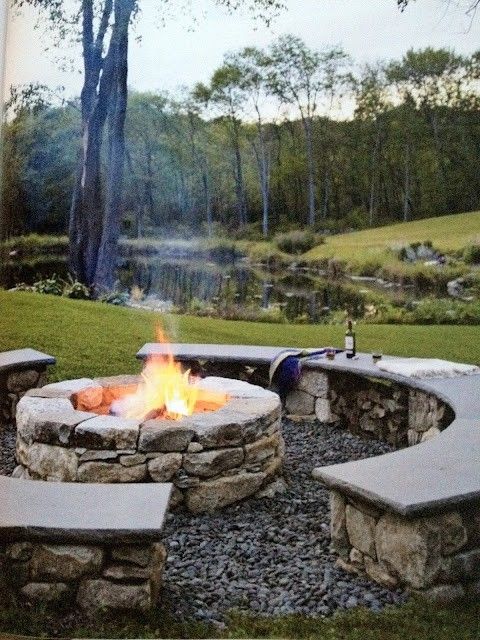
Our yard has been buzzing with activity this season; I’m thankful to be married to a man who is so gifted. Wes has spent several hours over the spring and summer season complementing our garden with three dry lay stone benches (you can see the stories here).

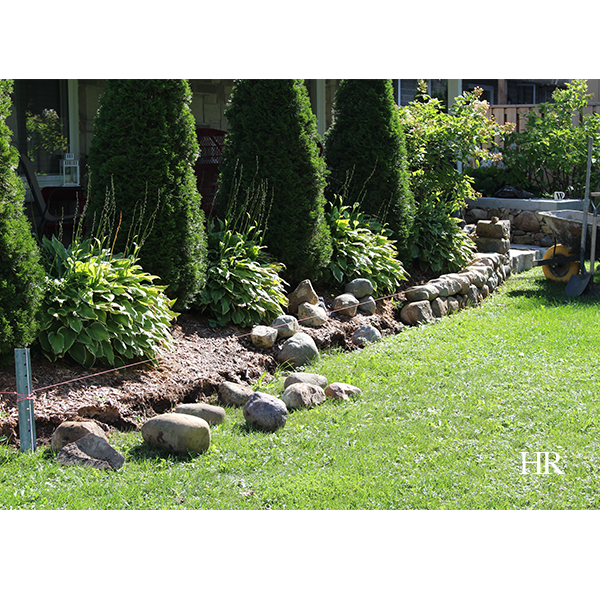
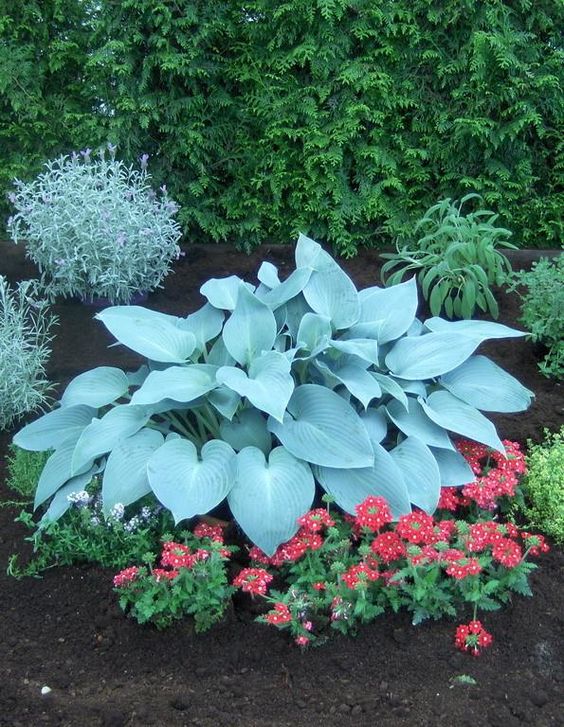
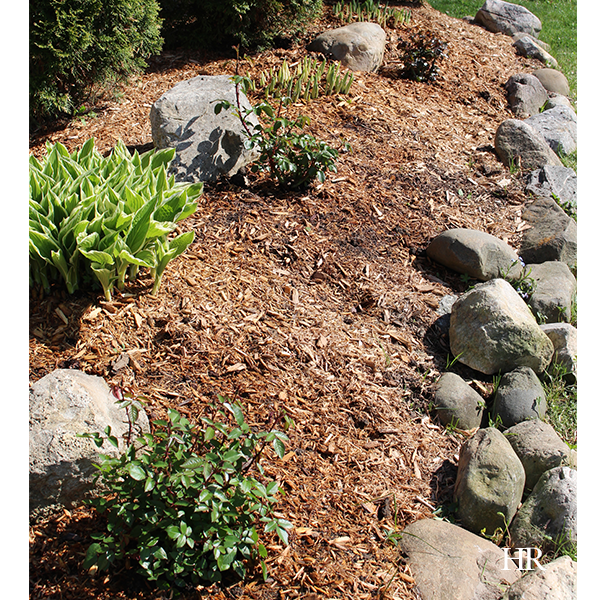
After the completion of our stone benches, Wes started on our garden stone border. Previously, we had a single row of large rocks edging our flower beds. We thought it would look beautiful to tie in the strength of the dry lay stone benches off the patio, and bring them all around the flower bed, creating a strong stone border to showcase our garden.

garden stone border

After pulling the stones that were originally edging the garden, Wes stationed some stakes at either end of the garden as well as the corner, and strung a line around the perimeter of the flower bed. He also levelled the line so it was even all around. This line acted as a guide as Wes built the border, to provide consistency in both height and straightness.

garden stone wall

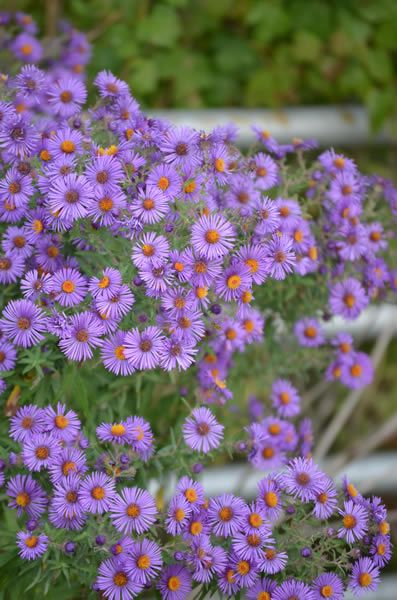
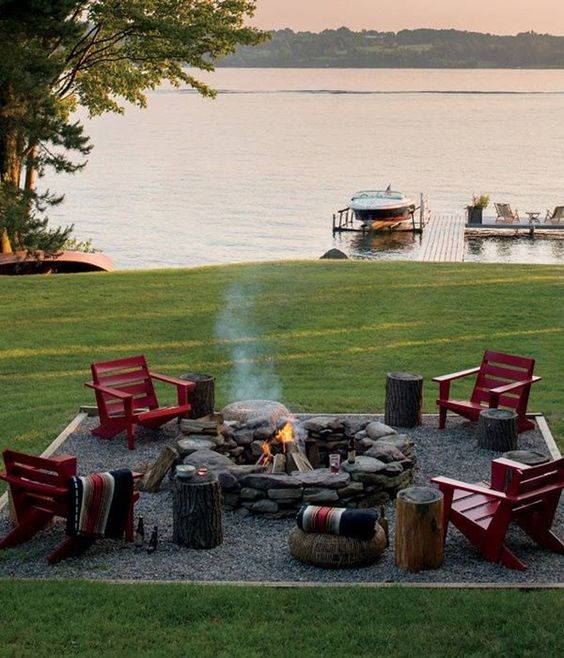
Another important thing to keep in mind if you’re looking to create your own garden stone border, is how you disperse the large stones throughout the border. Wes was careful to keep things consistent so that all the large stones were not bunched in one area, but rather dispersed evenly throughout the garden wall. As you can see from the photo above, the start of the garden stone border blends well with the dry lay patio bench, and is about half the height of the bench.

garden stone border

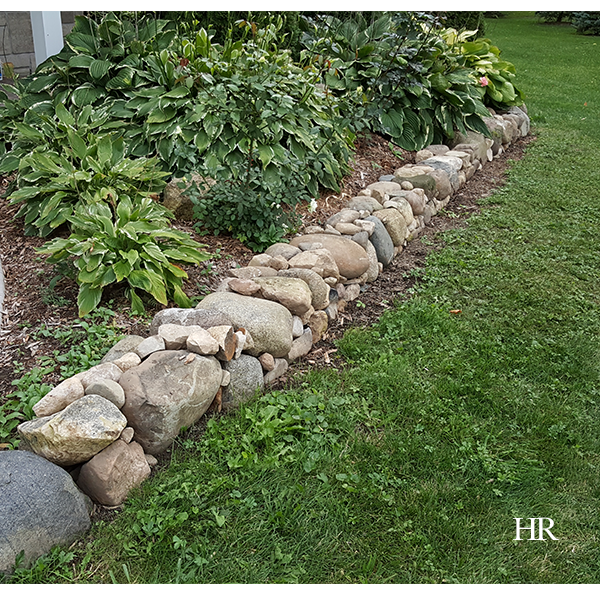
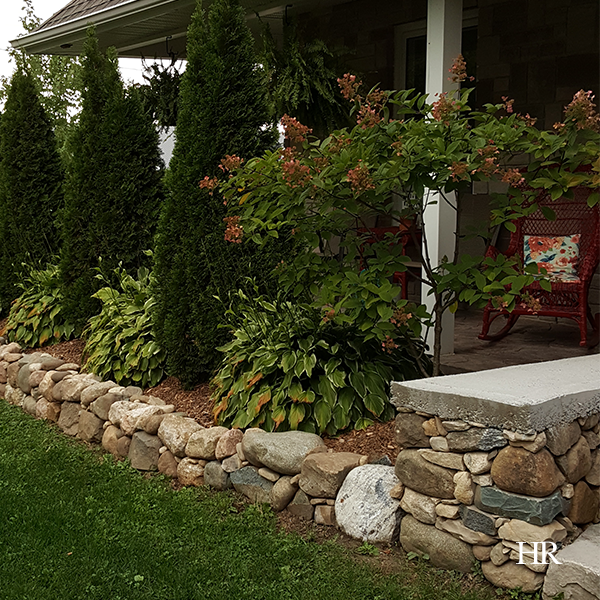
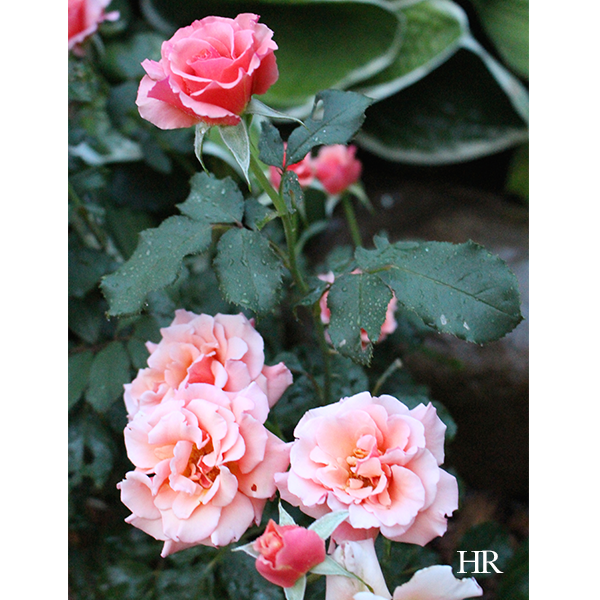
It’s important to keep colour in mind if you’re building a stone garden border (or a stone wall of any kind, for that matter). Sometimes the colour of the stone is more important than the size or shape. Notice in the photos above, how Wes evenly distributed stone colours, size, and shape to achieve a uniform, attractive edge. The photos don’t really do it justice, but this wall is incredibly constructed, and has an even, flat top and straight lines.

garden stone border

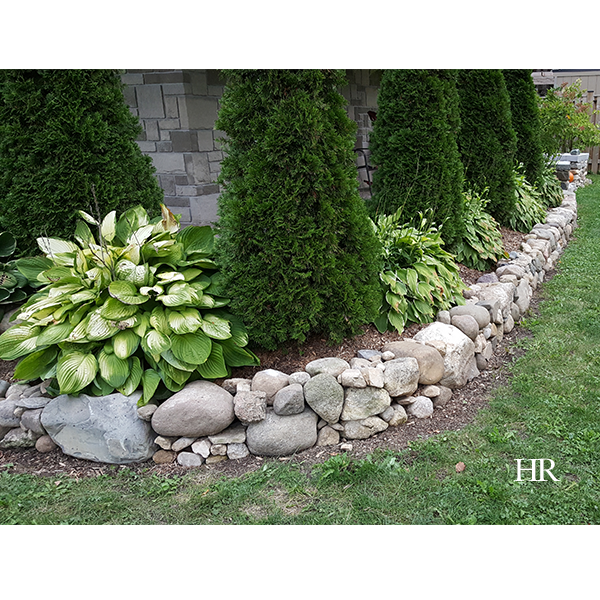
Wes did quite a bit of working and re-working to consider where the stones would best fit. Not only is he extremely gifted, but patient as well! The end result is a classic, eye-catching stone garden border that really highlights our flower beds.

Thursday

8

September 2016

5 Fall Flowers for Your Garden

Written by , Posted in Gardening

There’s certainly (hopefully) still some warm weather to enjoy before we’re full-blown into Fall, especially if our ferns, hydragneas, and rose bushes are any indication. That being said, Wes and I have been putting some thought into Fall flowers and considering what we’d like to incorporate into our yard in the future.

I’ve been pinning some great Fall flower gardening options over on my Pinterest, and I’ve got to say, the options for flowers in a Fall garden are endless! There are so many varieties of blooms out there. We’re already planning ahead what perennials we want to get growing for next year. In the meantime, here are 5 Fall flowers for your garden:


1. Aster. Ah, the aster flower. In hues like purple, white, pink, and even blue, asters provides excellent colour to stand out in your Fall garden, long after other blooms have died off for the year. While they look similar to mums, don’t be deceived. Asters don’t come in as many varieties or colours as mums.

5 fall flowers for your garden asters

img src prariemoon.com


2. Colchicums. Beautiful, bold, and bright, colchicums (like the Waterlily variety pictured below) provide a lovely spread of blooms throughout the Fall. Available in white and pink hues, colchicums are a great perennial to plant and enjoy year after year.

5 fall flowers for your garden colchicum flowers

img src Brecks Bulbs


3. Sedum. These flowers are a sure sign to me that autumn is in the air. I can remember sedum flowers growing in my Mum’s garden when I was a child. This perennial features clusters and clusters of flowers, most commonly in a reddish pink colour. Sedums are a beautiful Fall flower!

5 fall flowers for your garden sedum flowers

img src Fine Gardening Magazine


4. Helenium. How cheerful are these daisy-like flowers?! Heleniums look like a happy flower. Featuring velvety petals and available in a variety of autumnal shades, heleniums boom very late Summer and they love sun.

5 fall flowers for your garden helenium

img src Jacky Parker Floral Art Flickr


5. Mums. Chrysanthemums are probably the quintessential Fall flower. Available almost everywhere, fall mums are a classic flower to add some colour to your yard throughout the autumn months. Mums are beautiful, bright, and hardy.

5 fall flowers for your garden mums

img src thriftydecorchick.blogspot.sg

If you’re looking for more inspiration for your Fall garden, head on over to my Pinterest page and follow along!


Thursday

1

September 2016

3 Hostas to Add to Your Garden

Written by , Posted in Gardening

I’m a huge fan of low maintenance plants, so it’s no surprise that hostas are one of my favourite perennials. Requiring little maintenance, hostas can grow just about anywhere, and besides watering, they’re some of the most low maintenance plants for your garden. If you’re looking for some hostas to plant in your garden, check out my Hosta Pinterest board for some inspiration!

Here are 3 hosta varieties to add to your garden that will definitely stand out:

1. White Feather Hosta. White feather hosts plants are characterized by their large, pure white leaves that emerge in late spring/early summer. Throughout the summer, you may notice green streaks developing on the foliage, and lavender flowers.

white feather hosta

img src jparker


2. Inniswood Hosta. What I love about the Inniswood hosta variety is the distinct texture on the leaves. While the colour of this hosta is similar to other varieties, the texture on the leaves gives almost a metallic look to the plant.

inniswood hostas

img src sunnysidegarden


3. Canadian Blue hosta. The Canadian Blue hosta has to be one of the most different hosta varieties that I’ve ever seen. I love how the steely blue contrasts against the green in the rest of this garden. What a beautiful plant!

canadian blue hosta

img src tradera

For more pictures of hosta plants and lots of gardening inspiration, follow me on Pinterest!

Tuesday

23

August 2016

Roses: Rosa Hybrid Ten-Ten Hybrid Tea Rose

Written by , Posted in Gardening

It’s no secret that Wes and I are big fans of roses. This Summer, we picked out three rose varieties to plant in our garden. I’ve already shared with you about our white Bolero Floribunda roses and our Singin’ in the Rain Floribunda roses, and today we’re talking about our Ten-Ten hybrid tea roses.

our ten-ten hybrid tea rose bush

Initially, we picked out the best looking rose bushes we could find, meaning, the rose bushes were showing promise of new growth, and the leaves looked healthy. We planted the bushes the day we purchased them, making sure to pack the plant down with our feet and give it a good watering after establishing it in its new home. We chose our front garden as it gets 6+ hours of sunlight each day (rose bushes require full sun), and we planted each of our three rose plants in an area where the moisture from watering would hold (each is stationed near a large stone).

blooms from our rose bush

One of the things to look for when you’re shopping for garden plants is new growth. Our Ten-Ten hybrid tea roses had one partial bloom and several buds (as pictured above).

ten-ten hybrid tea roses

As you can see, without any fertilization at all, our red tea roses produced several large, beautiful blooms. What you can also see in the photo above is that we did run into a minor setback with saw fly larvae. To solve this problem, Wes killed all the worms (you can also buy plant soap for a bath, or just use some Dawn soap diluted with water).  We trimmed back the bushes, and fertilized, and then we were back on track.

red tea roses bloom

Characterized by large, lovely blooms, hybrid tea roses are apparently the oldest group classified as a modern garden rose. There are many different varieties, however we’re loving these Canadian grown red beauties. They add a beautiful pop of colour to our front garden.

after fertilizing, our roses showing new growth

Before fertilizing your roses, I’d highly recommend trimming back the plant. After the first of our ten-ten hybrid tea roses had bloomed, we trimmed back the entire rose bush, used Miracle Gro, and the above photo is the result after a couple of weeks. The roses grow back stronger, with longer stems, and with larger blooms (also several more blooms than when we planted the rose bush initially).

after fertilizing, our roses showed more growth

Tuesday

2

August 2016

Roses: Rosa Hybrid Singin’ In the Rain Floribunda Rose

Written by , Posted in Gardening

A couple of weeks ago, I shared the first photos of the Bolero Floribunda Rose bush that Wes and I planted. Today, we’re sharing photos of our Singin’ in the Rain Floribunda Rose, one of three rose varieties that we planted in our front garden this Spring.

singin' in the rain floribunda rose

New bloom on our Singin’ in the Rain Floribunda Rose

On the receiving end of 6+ hours of sunlight each day, our front garden is the ideal spot for roses. Wes and I have been very impressed so far with the performance of our rose bushes so far this year. We water the roses regularly, and we’ve also been using a rose fertilizer every 10-14 days.

singin' in the rain floribunda rose

Our Singin’ in the Rain Floribunda Rose bush after we first fertilized

We got a few blooms right in the beginning, and then we trimmed the bush back. After fertilizing the first time, we saw thirteen more blooms, which we’ve since pruned back (and we’re now seeing more blooms). The Singin’ in the Rain Floribunda Rose is a brilliant copper-apricot peach coloured flower on a deep green leaf.

Singin' in the Rain Floribunda Rose

The brilliant peach-coloured blossoms of the Singin’ in the Rain Floribunda Rose

Admittedly, Wes and I have had some struggles with two of our rose bushes this year. Our Singin’ in the Rain Floribunda Rose and our Ten-Ten Hybrid Tea Rose have been plagued with sawfly larvae (more on that later). After treating the bushes and trimming them back, the new blooms appear unaffected.

singin' in the rain floribunda roses

Trimming back our Singin’ in the Rain roses after they were attacked by rose sawfly larvae.

Growing up to 6 feet tall and 4 feet wide, many people choose to use Singin’ in the Rain Roses as part of a plant hedge, by planting multiples of the rose bush in one place. Roses in general are also a great plant choice if you’re looking to attract bees to your garden.

Singin' in the Rain Floribunda Roses

Our Singin’ in the Rain Floribunda Roses after fertilizing.

You can see in the above photo how the hue of apricot/peach deepens with each new bloom. Older blooms are apt to be lighter in colour. The Singin’ in the Rain Floribunda Rose is an excellent specimen if you’re looking to trim and enjoy the cut flowers inside. Just beware that this specimen of roses has a thick spine and thorns.

Singin' in the Rain Floribunda Roses

We’ve been enjoying our Singin’ in the Rain Floribunda Roses this year!

If you’re looking to plant rose bushes in your yard, we’d recommend you choose to plant them in the Spring, in an area of your yard that receives lots of sunlight. Also, watering and regular fertilization is key. Wes and I have been using Miracle Gro, however there are other rose fertilizers on the market with good reviews. We are enjoying this particular rose variety, and look forward to many more blooms even before the end of this season!

Tuesday

12

July 2016

Roses: Rosa Hybrid Bolero Floribunda Rose

Written by , Posted in Gardening

roses bolero floribunda rose

Our rose bushes after we first planted.

It’s no secret that I’ve always had a soft spot for roses. This Spring, Wes suggested that we plant some of our own rose bushes to grow some blooms at home. We picked out three varieties — the Bolero Floribunda Rose, the Ten-Ten Hybrid Tea Rose, and the ‘Singin’ in the Rain’ Floribunda Rose — and we planted them in our front garden.

roses bolero floribunda rose

First bloom of our Bolero Floribunda Rose.

We chose our front garden as it gets the majority of sun (6+ hours each day), which is a requirement for successfully growing any plant in the rose family. Most roses do well with lots of sunlight, as well as regular watering.

roses bolero floribunda rose

First blooms from our Bolero Floribunda Roses!

Bolero Floridbunda roses are usually 2-3 inch blooms with seemingly endless layers of petals and a unique fragrance. Their full petals resemble a small peony, and their foliage is typically a very rich green.

roses bolero floribunda rose

Bolero Floribunda Rose

Originally from France (now grown all over, and in Canada), Bolero Floribunda roses are known to be one of the more disease-resistance varieties of roses. Spoken from experience, our Bolero Floribunda roses were the first bush to bloom of the three that we planted in our front garden.

roses bolero floribunda rose

13 blooms at the peak of the Bolero Floribunda Rose.

The blooms have come and gone for this season, and Wes and I have pruned them back. We fertilize every other week, and we’re already starting to see new growth!

roses bolero floribunda rose

Lots of layers in the blooms of the Bolero Floribunda Rose.

Tuesday

5

July 2016

5 Inspiring Outdoor Fire Pits to Add to Your Back Yard

Written by , Posted in Gardening

With Summer in full swing, we’re spending as much time outdoors as possible. One thing on the horizon is a fire pit, if ever we can find the time! We’re big fans of natural stone, so planning our fire pit does not involve any kind of pre-fab “kit”. Rather, we’re considering a dry lay, similar to the dry lay stone bench that Wes has been working on. Check out my Outdoor Living board on Pinterest for more fire pit inspiration, and in the meantime, these are 5 amazing fire pits that have really got me feeling inspired!

1. Fire Pit by the water. I’m not a huge fan of pea gravel, but I do love the set up of this fire pit. The sectioned-off area creates definite separation from the grass, and I absolutely love the dry lay of the actual fire pit. Accented with some fantastic colonial red chairs and log side tables, this fire pit is sure to be a spot for making memories.

fire pit

img via Fieldstone Hill Design Darlene Weir

2. Fire pit and bench. Outdoor seating doesn’t always have to be done with chairs, so it makes complete sense that this fire pit has a complementary surround in the same style. Again, I’m not a huge fan of gravel, but in this situation it works.

fire pit

img via indulgy.com

3. Dry lay fire pit. This fire pit is amazing! Check out the intricate details that went into this fire pit. It features some detailed arches and bottom vents to keep air flowing and fire glowing. Absolutely love this set up, and I think it would look great with a flagstone surround.

fire pit

img via Jessica Little House Big Heart

4. Flat and flush fire pit. While I’m more a fan of a fire pit that really stands out, I also appreciate the simplicity of this fire pit, which lays almost flush with the interlocking stone surround. There’s something to be said of this circular set-up, and I especially like that it’s at the end of a walk out with one stone step. Complementary landscaping around finishes the look and adds privacy.

fire pit

img via sunlitspaces.com

5. Built in fire pit. Speaking of privacy, this fire pit is actually built into a stone wall surround with some serious foliage behind. For a property on the road or bordering another home, this set up would be ideal. The stone wall surround means extra seating, and the open front of this fire pit provides plenty of heat.

fire pit

img via Better Homes and Gardens


Thursday

19

May 2016

Hope’s How-To: Build a Robin’s Nest – Part 3 – Baby Robins Are Here

Written by , Posted in Christian Living, Gardening, Hope's How-To

mama robin feeding baby robins

They’re here!

While Wes and I were away, looks like Mama Robin had plenty of time to sit on her eggs! Four sweet baby robins have entered in to the world and are being raised on our patio. Wes has had to remind me several times to give the new family space—especially since the temperatures have been so cold—however today I was able to capture some photos of our tenants.

mama robin feeding baby robins

Mama and Papa Robin have pretty much taken over our property, and even pulling up the drive I can see them bouncing around on the lawn, giving me their most threatening glances. Fortunately, yesterday evening, I was able to get some photos of mama robin feeding her baby robins.

mama robin feeding baby robins

It is quite a phenomenon, watching robins feed their young. Robins are an altricial species, meaning that their young are hatched or born in an undeveloped state that requires care and feeding by the parents. Unlike chicks who hatch in a more mature state, baby robins aren’t the best looking birds of the bunch (although admittedly I do find them quite adorable).

mama robin feeding baby robins

Most baby robins have very few or no feathers, bulging eyes, and almost transparent skin. It is truly a miracle of creation to see these little birds up close, and also to observe the parent robins feeding their young.

mama robin feeding baby robins

Interestingly enough, robins start feeding at sunrise, and often Mama and Papa robins feed their young about every twenty minutes from sunrise to sunset. Their diet consists mostly of worms and berries.

mama robin feeding baby robins

Typically it takes baby robins two weeks (likely 9 to 16 days) to be fledged before they fly from the nest, and you can usually tell once baby robins are a week old as the parent robin(s) stop sleeping in the nest around that time.

mama robin feeding baby robins

Another important thing to remember about robins is that the parent robins go by sight and sound, not by smell. This means, that unlike other animals with young, if you discover a baby robin that has fallen from the nest, you can gently pick it up and place it back in the nest without the Mama and Papa robins abandoning the fledglings.

mama robin feeding baby robins

“Look at the birds of the air….” {Matthew 6:26}


Wednesday

6

April 2016

Hope’s How-To: Build a Robin’s Nesting Shelf

Written by , Posted in Hope's How-To

april6_hopereflected_robin2

Spring is always an exciting time of year: The days are getting longer, the sun is shining brighter, and there are signs of new life everywhere. All this to say, we’ve had a less than stable Spring so far, what with fluctuating temperatures and seemingly endless snow. That’s got the returning robins scrambling, looking for a secure place to nest, and also foraging for food.

You’ve likely noticed the beautiful birds by the roadside or out on your lawn, looking for worms, berries, or other items to eat. They’re also deep into scouting season — looking for the best place to settle down, lay their eggs, and raise their young (for a full 13 days).

Being the compassionate person that I am, — save all the animals! — Wes agreed to build me a robin’s nesting shelf (or two!) to see if we could welcome a couple of new feathered friends to our home.

It doesn’t have to be complicated, in fact building a robin’s nesting shelf can be quite simple. You don’t have to use the best wood, and measurements don’t need to be exact. Just remember to include the fundamentals of a sturdy shelf made from non-pressure treated wood, a shelf approximately 8 inches squared (or something in that range), a height of at least 7 feet off the ground.

Here’s how Wes built ours:

  • For building my robin’s nesting shelves, Wes used 4-inch Spruce straps, non-pressure treated. You could use any other kind of wood, permitting it’s not pressure treated. Wes just used Spruce straps since we had them on hand.

april6_hopereflected_robin_nesting_shelf2

  • The platform should be approximately 8 inches squared, and depending on where you plan to install the nesting shelf, it may or may not need a roof (cover). Wes made one for me without a cover for under our covered porch, and one with a cover that’s on a more exposed side of the house.
  • Another key is that you don’t want to have any kind of barrier on the front of the nesting shelf.

april6_hopereflected_robin_shelf1

  • You’ll also want to be mindful that the nesting shelf is secured in a location where there is no way for cats or squirrels to climb up into the nest.
  • A good rule of thumb for where you’ll locate the nesting shelf, is to find a place close to your home that is between 7 feet tall and tree top height. It should be in a location that gets some sun, but also stays cool and dry.
    • Many people choose to secure a robin’s nesting shelf onto their home (rather than in a tree or on a fence) because predators like cats, squirrels, and even other birds (like Starlings or Crows) are less likely to get too close to your house. (You may have noticed in the past, that sometimes robins will choose to nest above a porch light or on top of a downspout, and this is why.)

april6_hopereflected_robin_nesting_shelf3

  • If your house is made with brick or stone, secure the nesting shelf with a tap-con or a concrete nail. Be sure to pre-drill to the appropriate size for that fastener. If your house is made with siding, before drilling, make sure you’re not compromising the house material or drilling into electrical/plumbing/etc.

april6_hopereflected_robin_nesting_shelf4

  • When the season is over, make sure to dispose of their old nest and clean the nesting shelf. Old nests have the potential to breed lice or mites. Besides this, next year, returning robins will build a fresh nest.
  • If you’re looking to make your nest shelf even more attractive, you could set out some berries or meal worms for the robins.

april6_hopereflected_robin_nesting_shelf5

Robins appearing are a sure sign of Spring. I hope you are able to take some time to get outdoors and appreciate the beauty of God’s creation during this season!

“The bird also has found a house, And the swallow a nest for herself, where she may lay her young…” {Psalm 84:3}

april6_hopereflected_robin1

Wednesday

30

March 2016

Hydrangea Plants

Written by , Posted in Gardening

Every Friday, Wes has been known to bring me a beautiful bouquet of flowers. This past weekend, we celebrated Easter with some beautiful Hydrangea blooms. We have two Hydrangea bushes in our outdoor garden (which usually bloom mid-summer). Since it’s too early for blooms outdoors, these indoor plants were a welcome addition to our kitchen, brightening up the space with their voluptuous shape and vibrant colour.

mar30_hopereflected_hydrangea1

The name Hydrangea comes from the Greek “Hydro“, meaning “Water“, and “Angeion“, meaning “Vase“. As you know, Hydrangea plants love their sun and they love their water. The plants have two flower arrangements: One is the mophead flower (pictured here), and the other is the lacecap flower.

pink and white hydrangea.

The Hydrangea plant was originally discovered in the 1730s by an English-American botanist, John Bartram. Bartram became King George III’s botanist and is widely known as the “Father of American Botany”.

mar30_hopereflected_hydrangea3

While white is the most common colour of Hydrangea, in some species the plant can also be pink, purple, blue, and even green. Regardless of the hue, Hydrangea blossoms remain some of my favourite. Not only is the flower itself beautiful, but these plants have healthy green leaves, which make for a lovely contrast.

mar30_hopereflected_hydrangea4